Activities on Mobile
You can think of Activities as the non-billable things you need to do to run your business. These can be recorded as Notes, Tasks, Calls, or Mail. You can track activities from the activities list, account pages, and the schedule.
To learn about activities on the desktop version of ServiceMonster, click here.
How Do I View Activities?
To open your activities on mobile, click on “My Activities” on the home page.
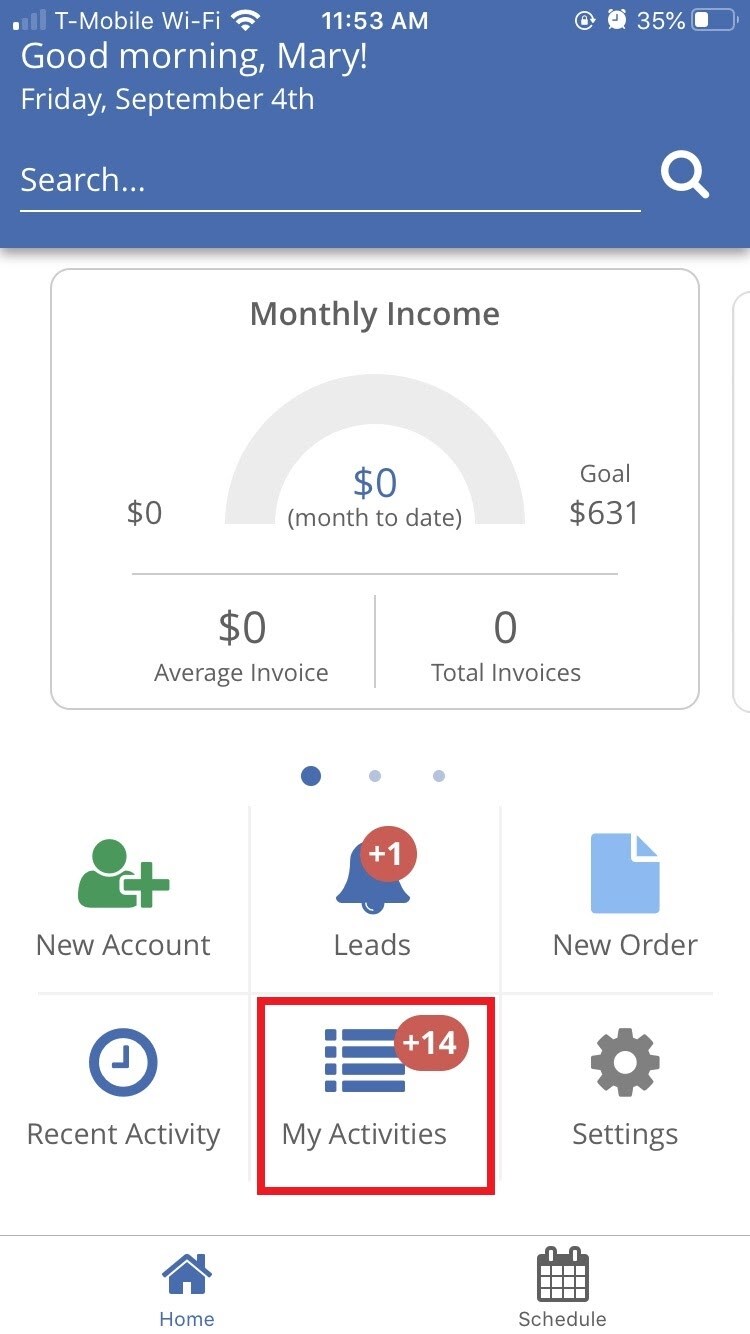
This opens up a page where you can view, create, and edit activities.
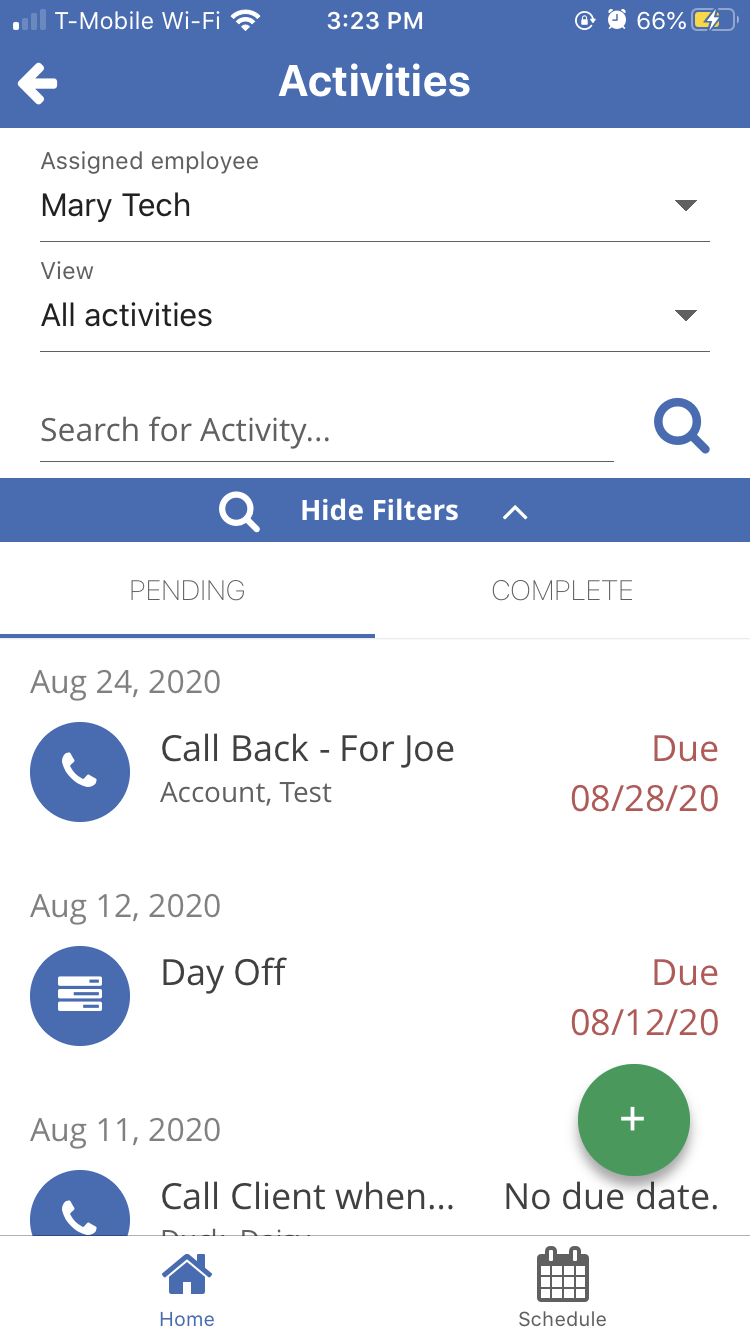
At the top of the page there is a number of filters you can apply to the list of activities.

Assigned Employee:
Here you can choose to look at activities assigned to a specific employee or look at all activities.

View:
Here you can choose between looking at All activities, To Do List, Missing Due Date, Calls, Mail, Notes, Tasks, Due On, or Due Week Of.

Search For Activity:
Here you can search for a specific activity, by name or account associated with it.

Hide Filters:
Clicking here hides the above filters, allowing you to see more of the activities. You can also click here again to open the filters up.

Pending or Complete: Toggle between if you are looking at a list of pending or complete activities.
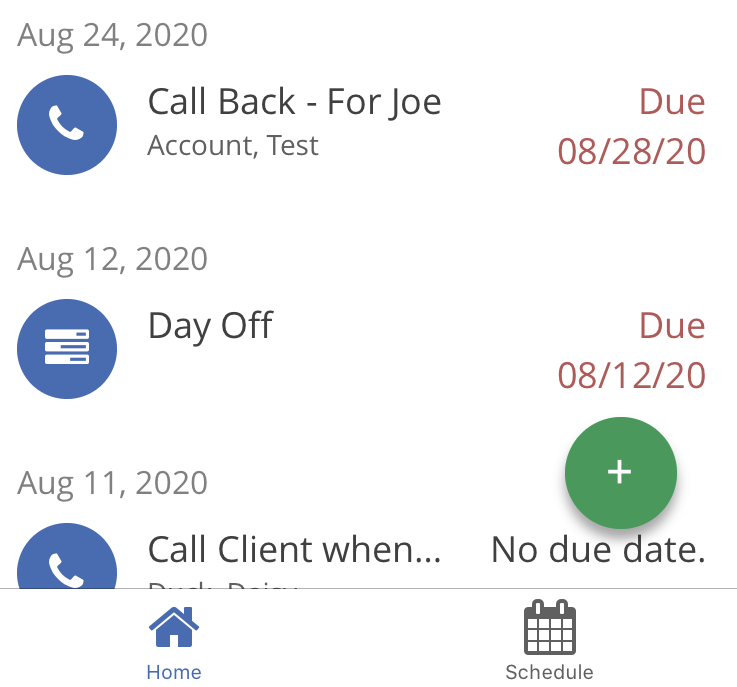
Here you can view the activities, clicking on the open’s that activity up.
You can also create a new activity by clicking on the green “+” button.
Creating A New Activity
Clicking on the green “+” button will open up a window where you can create a new activity. Here you can enter in the following information.
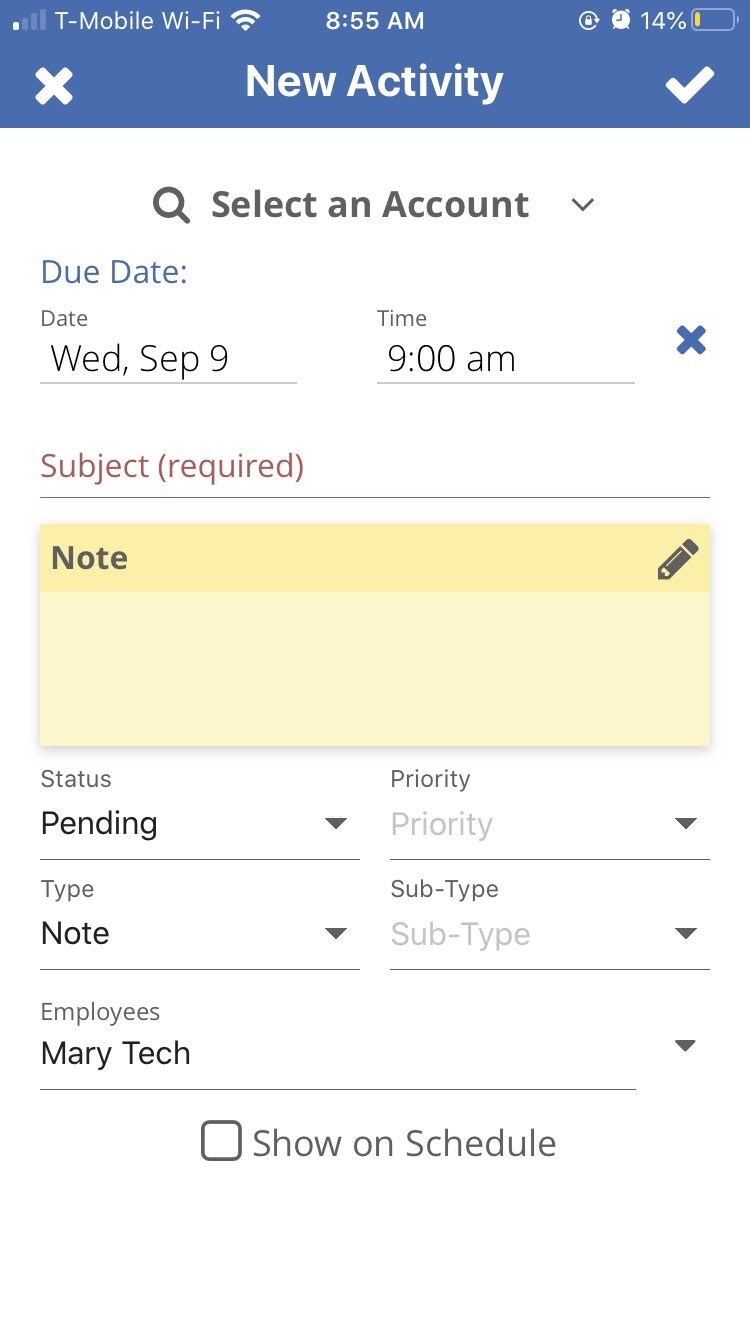
Select an Account: Here you can pick an account this activity is attached to, this is not required.
Due Date, Date: Pick a date this activity should be completed by.
Time: Pick a time this activity should be completed by.
Subject (required): You can think of the subject line as the name for this activity, this is what you will see on activity lists, so make sure to name it something that you can easily recognize.
Note: Add in notes on this activity, what needs to get done, who is involved, the conversation for the phone call, ect.
Status:Pick between “Pending” and “Complete”.
Priority: Pick between “High” and “Low”.
Type: Pick between “Note”, “Call”, “Task”, and “Mail”.
Sub-Type: This changes depending on the type of activity.
For notes, you can choose between “Internal” and “Tech”.
For calls, you can choose between “Inbound”, “Outbound”, and “Marketing”.
For tasks, you can choose between “Internal”, and “Customer Related”.
For mail, you can choose between “Inbound”, “Outbound”, and “Marketing”.
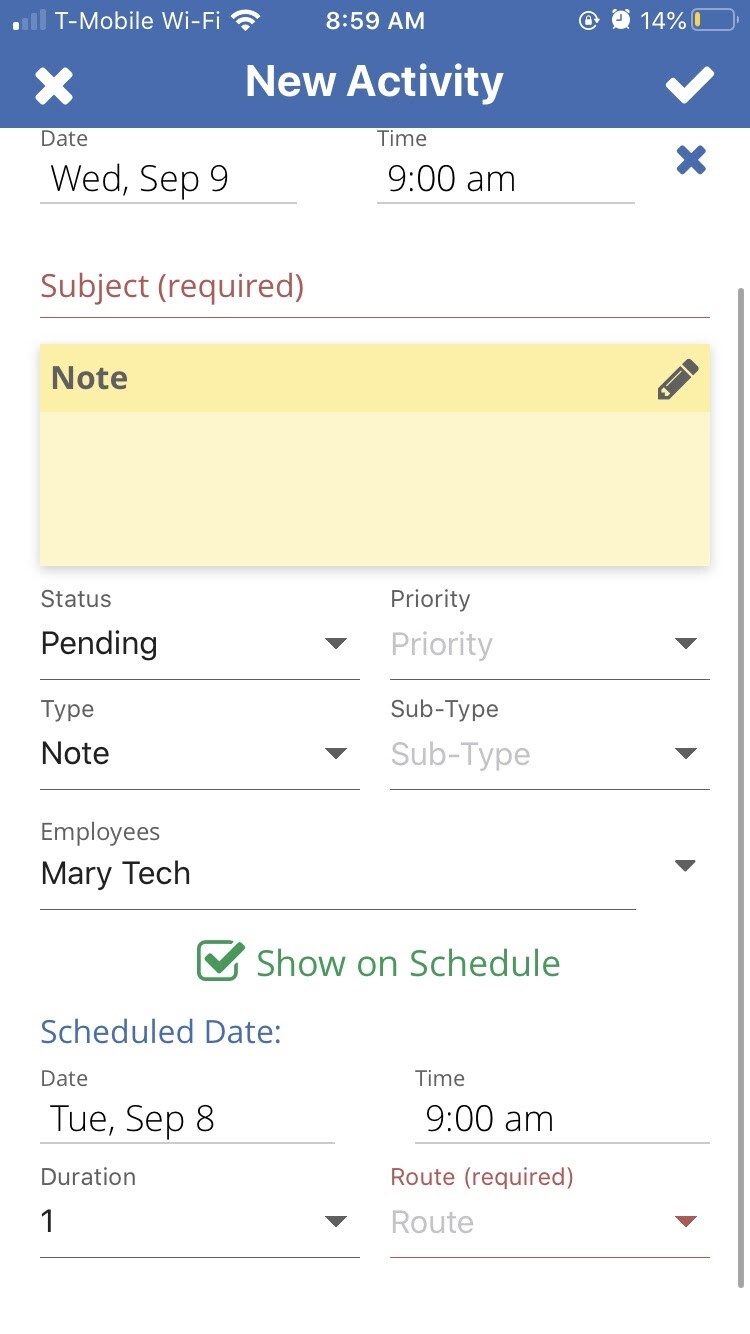
Employees: Select employees or users that are assigned with this activity.
Show on Schedule: Check this box if you want to show this activity on the schedule.
Scheduled Date, Date: Pick the day this activity will appear on the schedule.
Time: Pick the time this activity will appear on the schedule.
Duration: The length of time this activity will show up on the schedule for.
Route (required): Pick a route this activity will be scheduled on.
Once you have entered in all the information click on the check-mark in the upper right-hand corner of the app to create the activity.
