
Creating a New Custom View
Custom Views can be created from the Accounts List, Activities List, Orders List, and Job List. This example is for a Custom View from the Accounts List to find customers that have the Alert box checked:
- Click on Accounts
- Click on Accounts List
- Click on the drop-down arrow to select your view
- Click on +View Filter at the bottom of the selector box
- Will open the Custom View Builder window
- Name your Custom View. (I would suggest short names due to the size of the View Selector column)
- Click the Add Condition button
- Click the Field Selector drop-down arrow to select the field to use to filter your list. In this example, we are selecting the “Account: Alert” field with a condition of True
- Click the And button to add another filter. (In our example, we only want to see Active Accounts)
- Click the Field Selector drop-down arrow to select the next field to filter and choose “Account: Active” with a condition of True
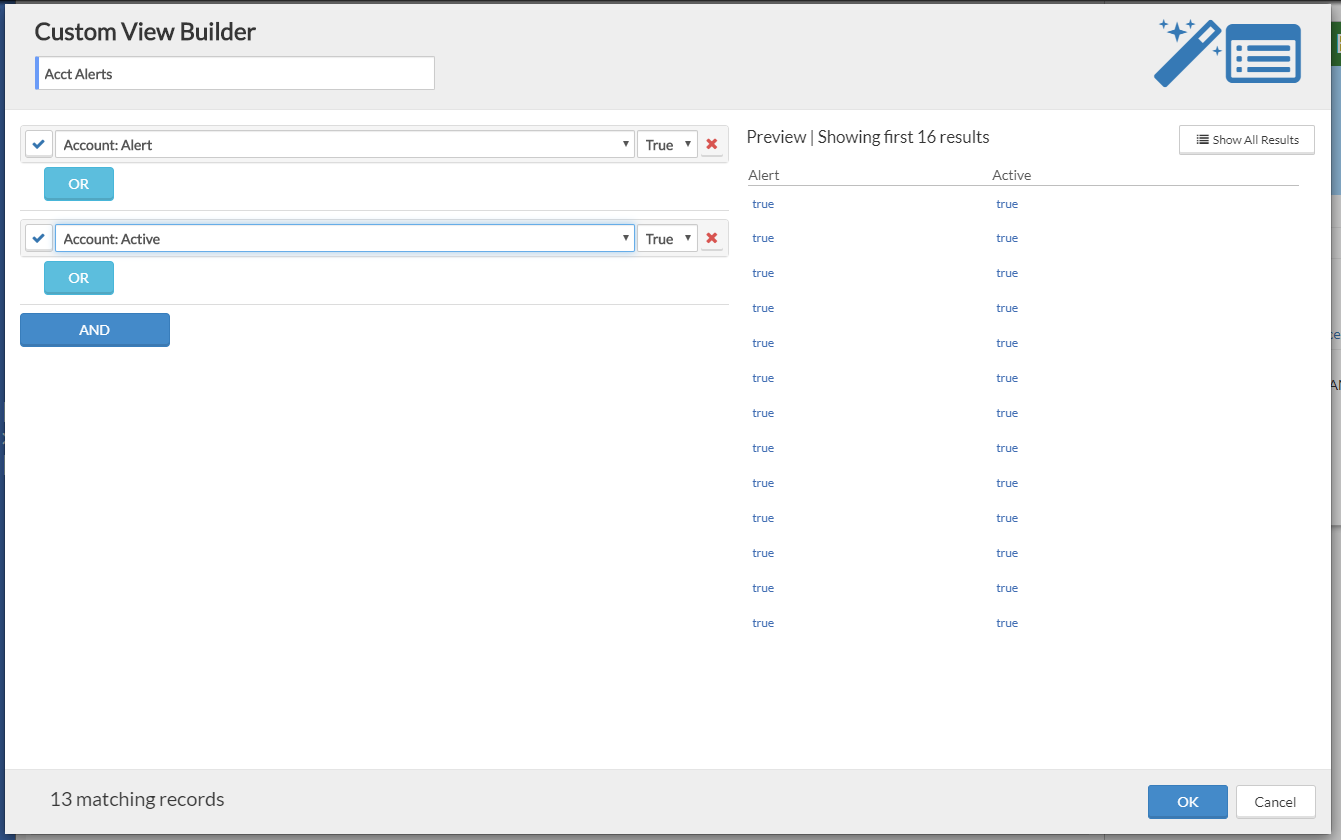
- Click OK when all filters have been added
- The grid should now reflect only the accounts that meet the criteria in the Custom View you just created.
NOTE: If you click into a customer account and want to get back to this same list view, you will want to use your Browser back button and not the Account List Breadcrumb on the ServiceMonster screen.
Choosing Columns
Once you have the account list in the grid, you can use the Columns button to choose what is displayed. If you do not see the Columns button in the top right, click the round button with the lines & select Advanced Options. Presto! The Columns button is now available.

Editing a Custom View
To edit the Custom View you created:
- Click on Accounts
- Click on Accounts List
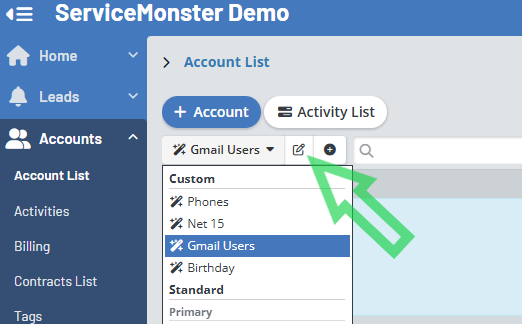
- Click on the drop-down arrow to select your view
- At the top of the list are your Custom Views. Click Custom View you want to modify, then click on the pencil button next to the dropdown. It will open the Custom View Builder window and allow you to edit the filters.
Using the Custom Views
To run the Custom View you created:
- Click on Accounts
- Click on Accounts List
- Click on the drop-down arrow to select your view
- Scroll down to the Custom Views and click on the custom view you want to run.
NOTE: If you click into a customer account and want to get back to this same list view, you will want to use your Browser back button and not the Account List Breadcrumb on the ServiceMonster screen.