
How to Take a Deposit on a Work Order
Taking a deposit on a work order helps secure payment upfront and keeps your records organized. Here’s a step-by-step guide to recording a deposit, tracking it, and ensuring your customer’s balance is accurate.
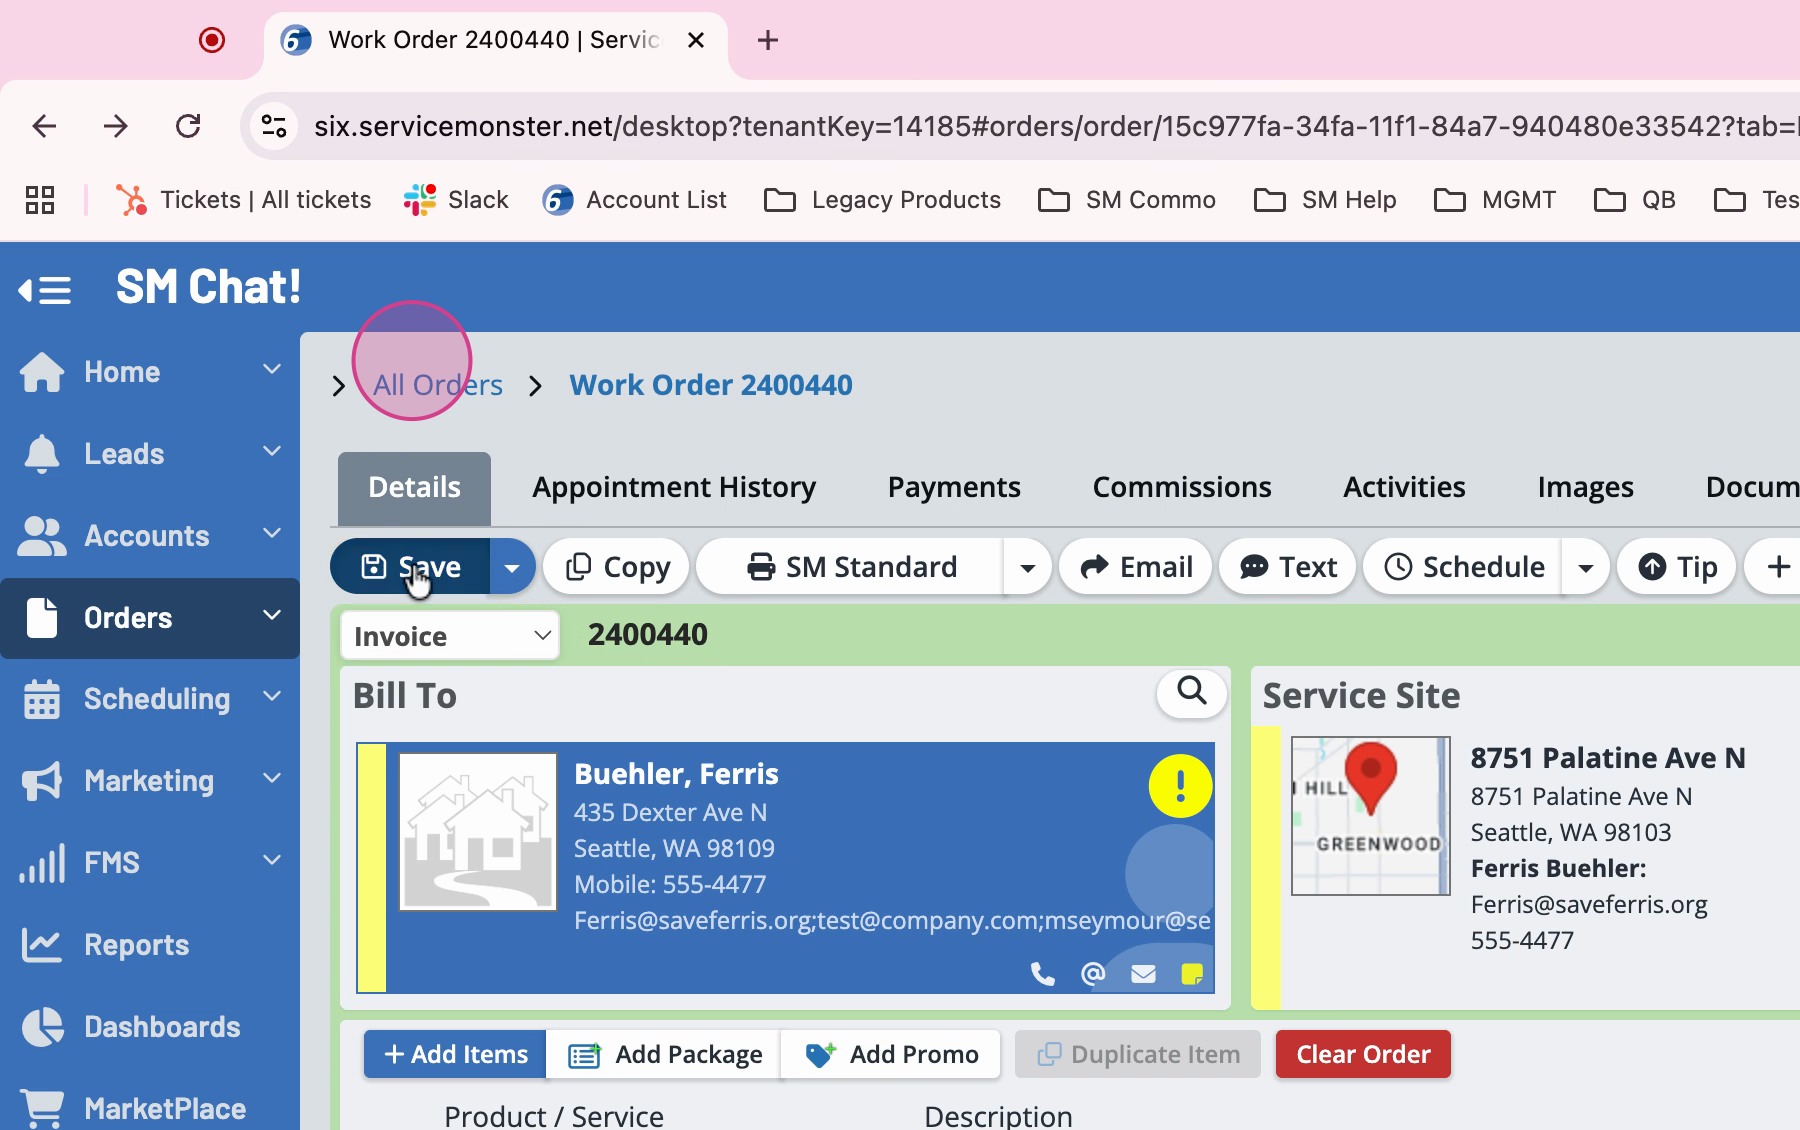
Step 1: Open the relevant work order.

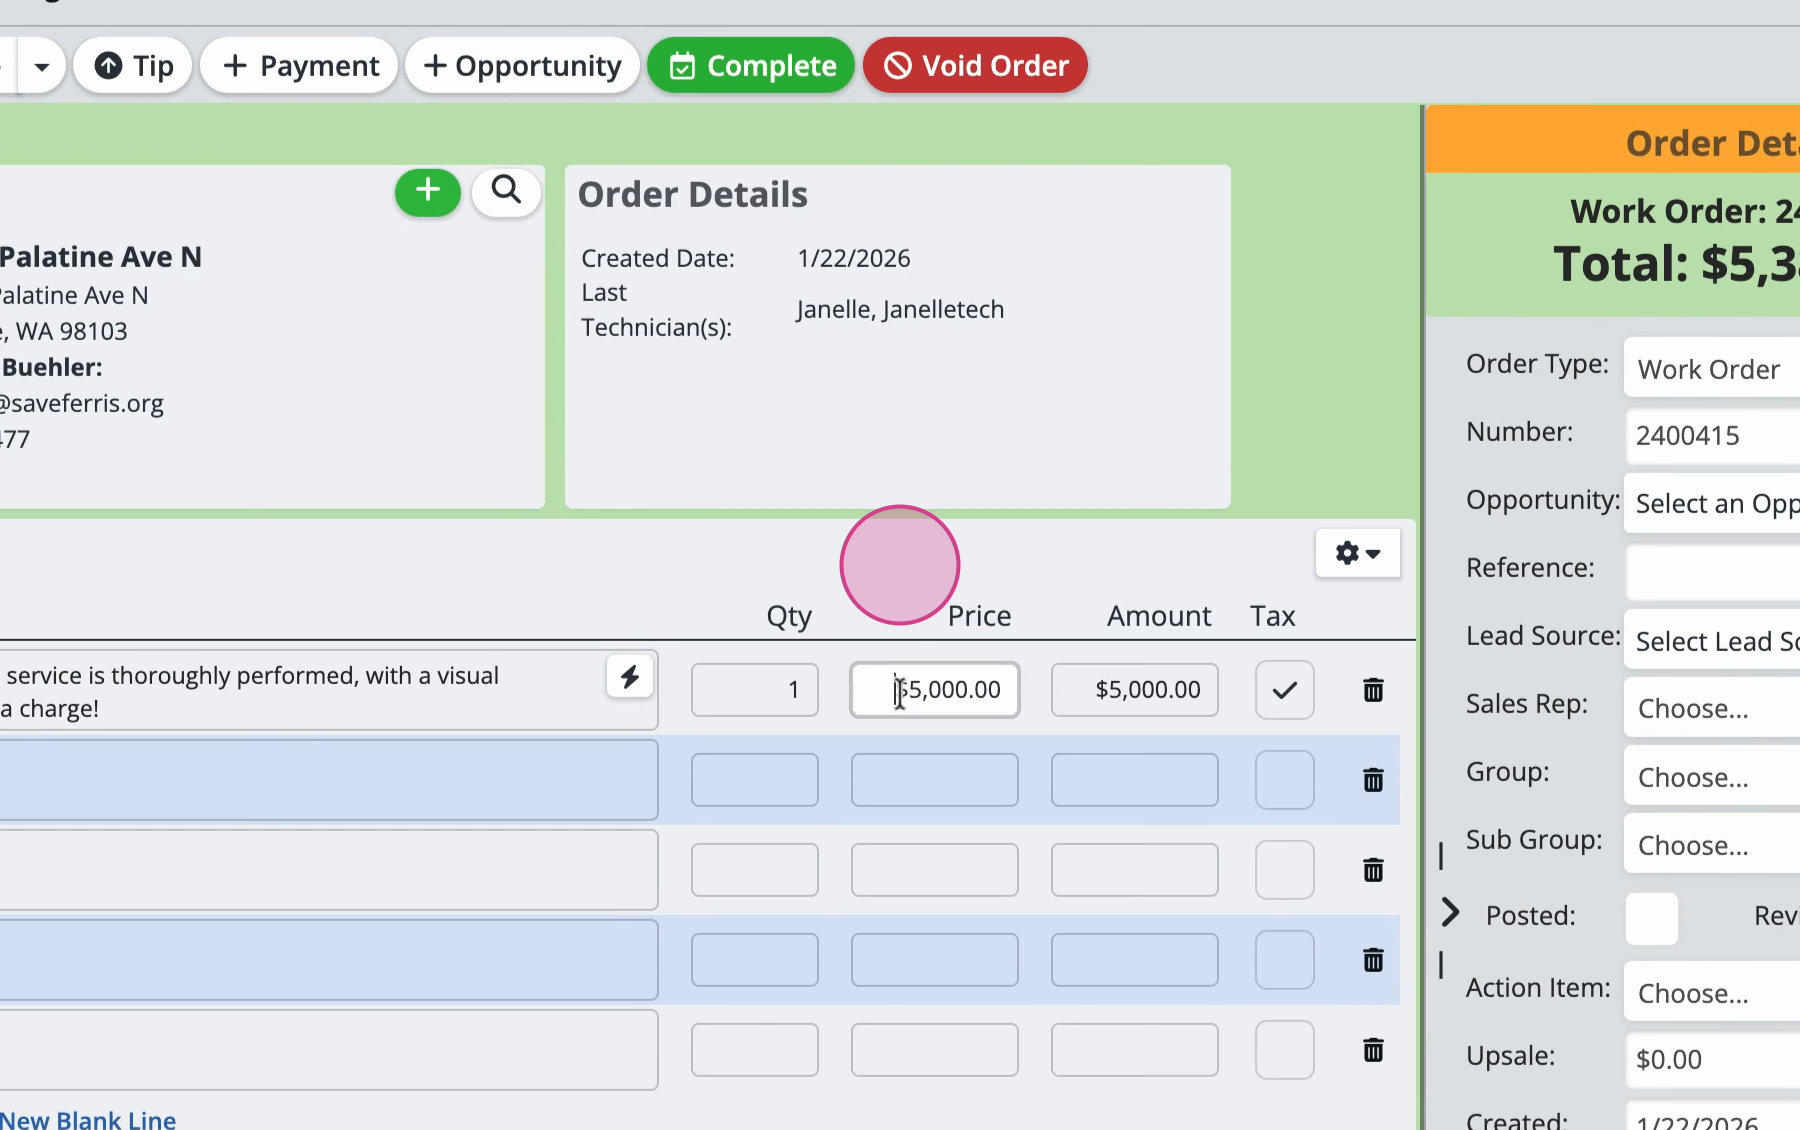
Step 2: Review the balance—note the total amount (e.g., $5,000).
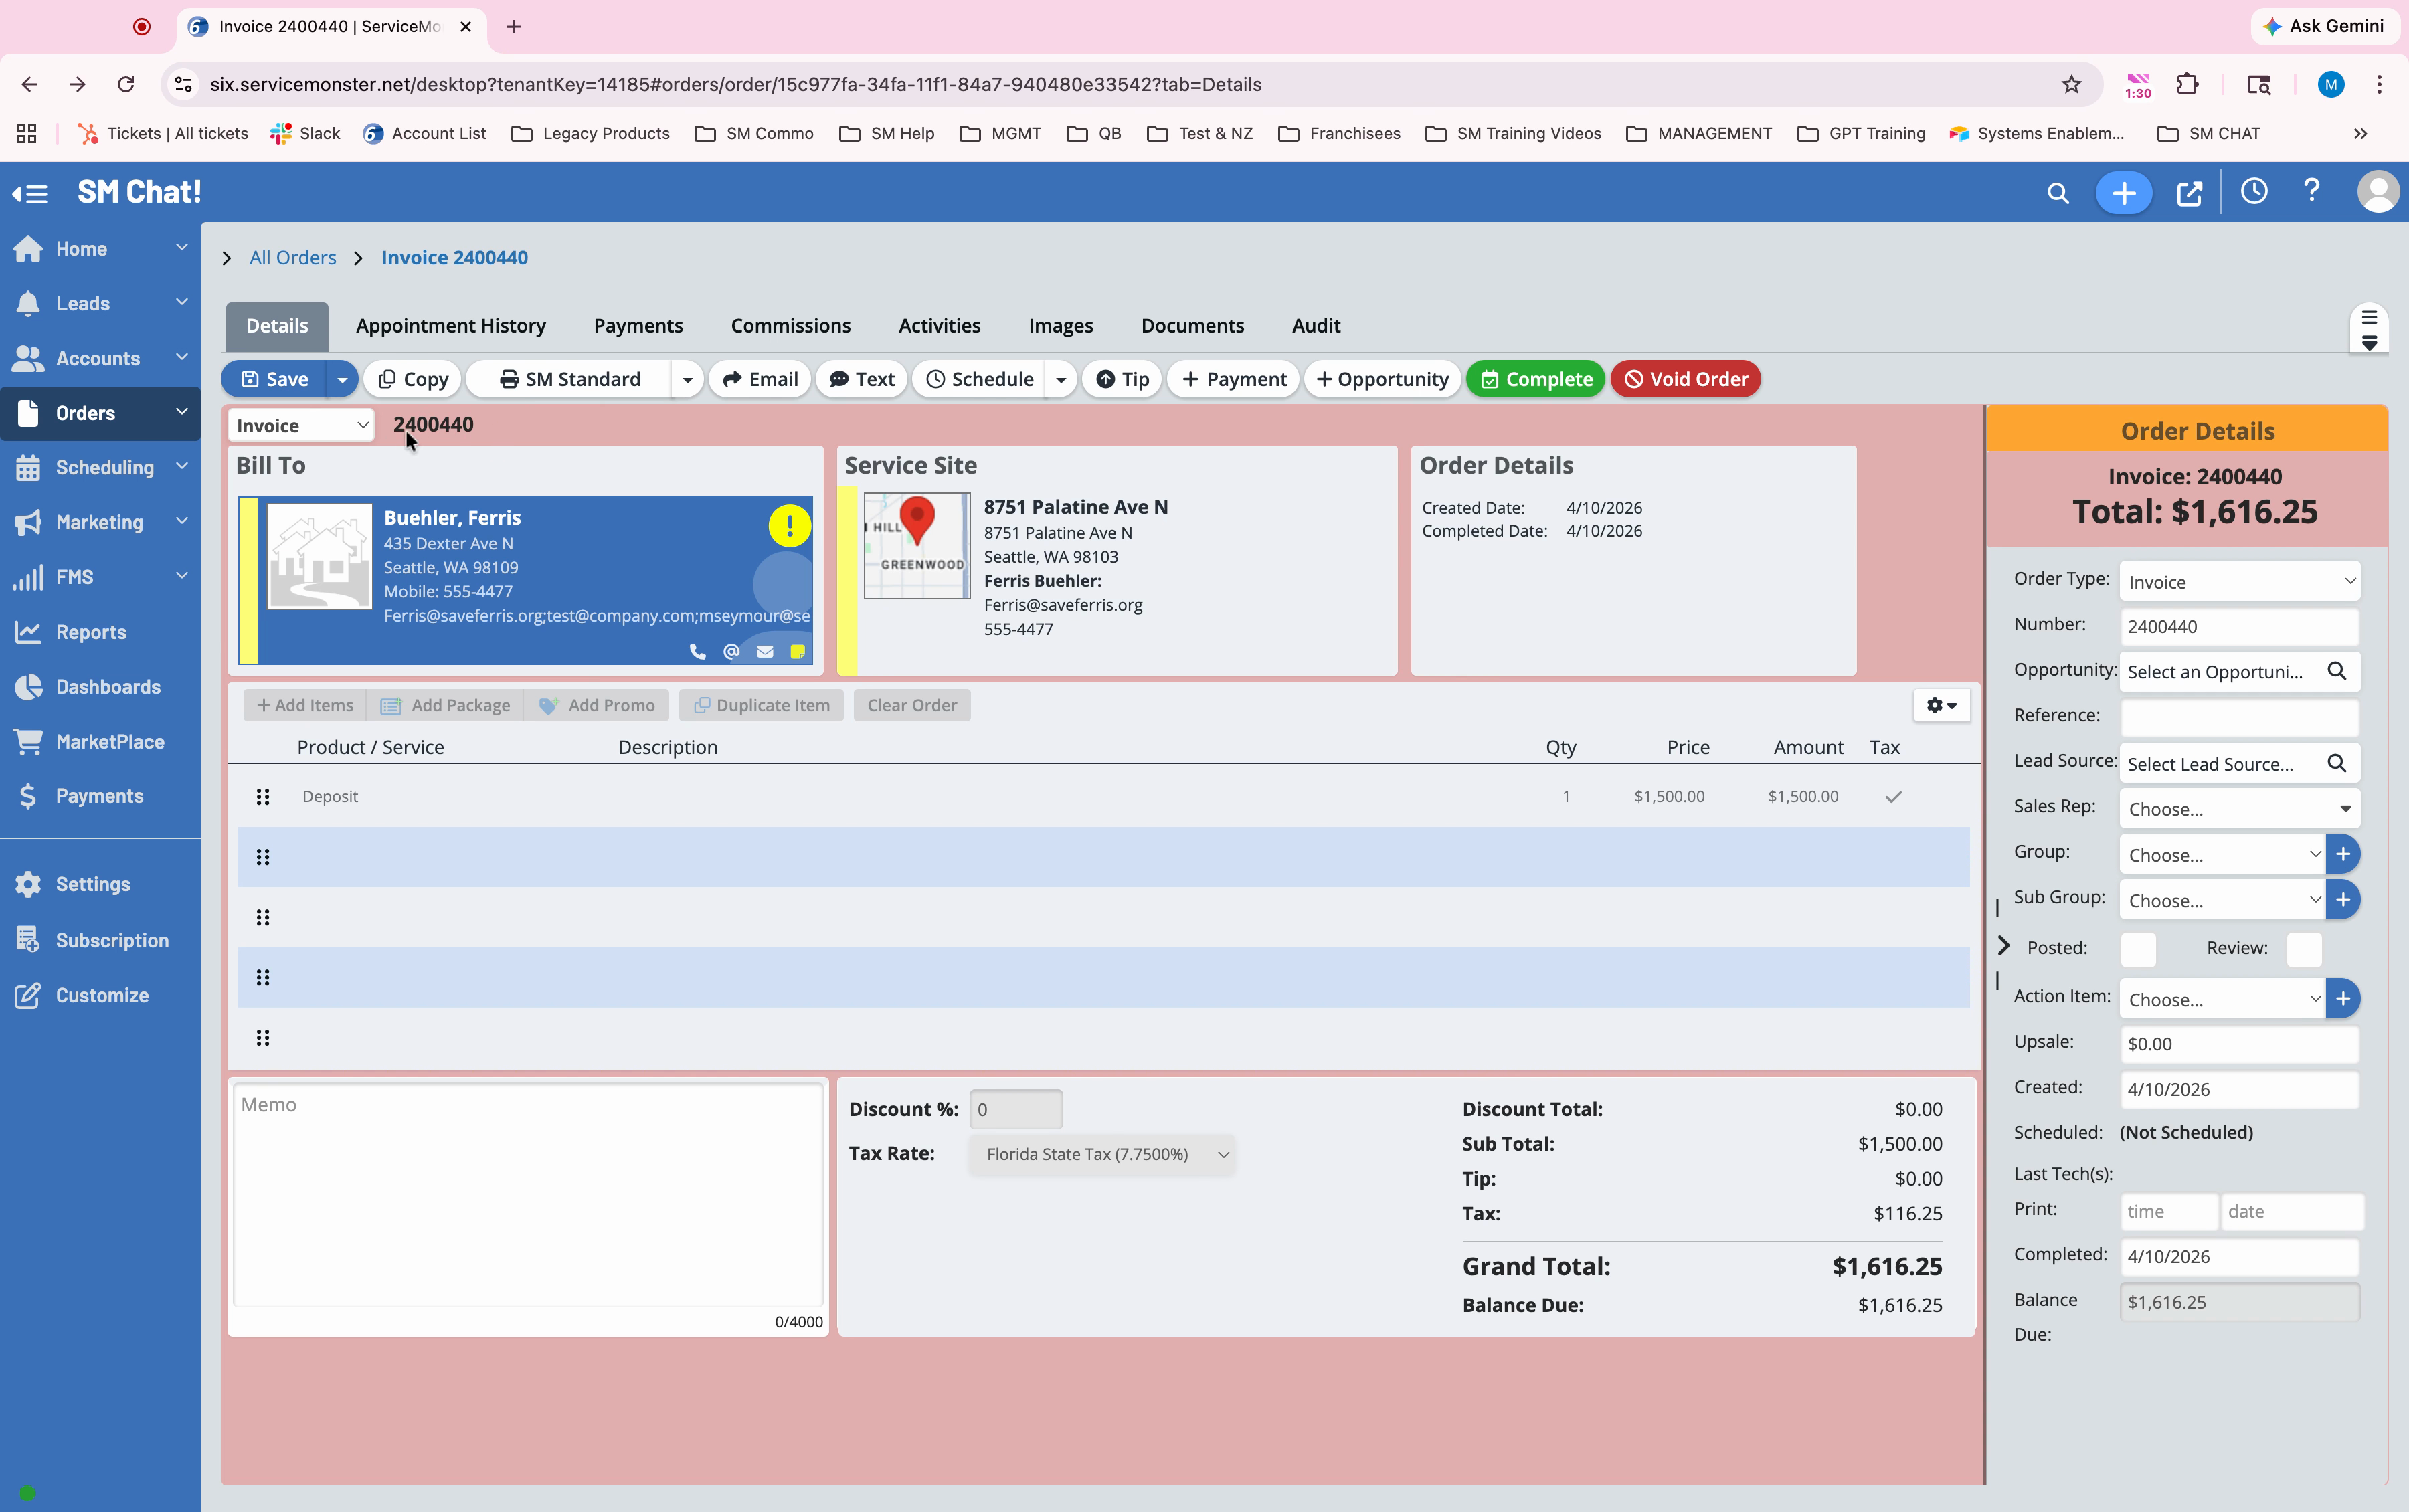
Step 3: At the top of the order, click the Copy button to duplicate this order.
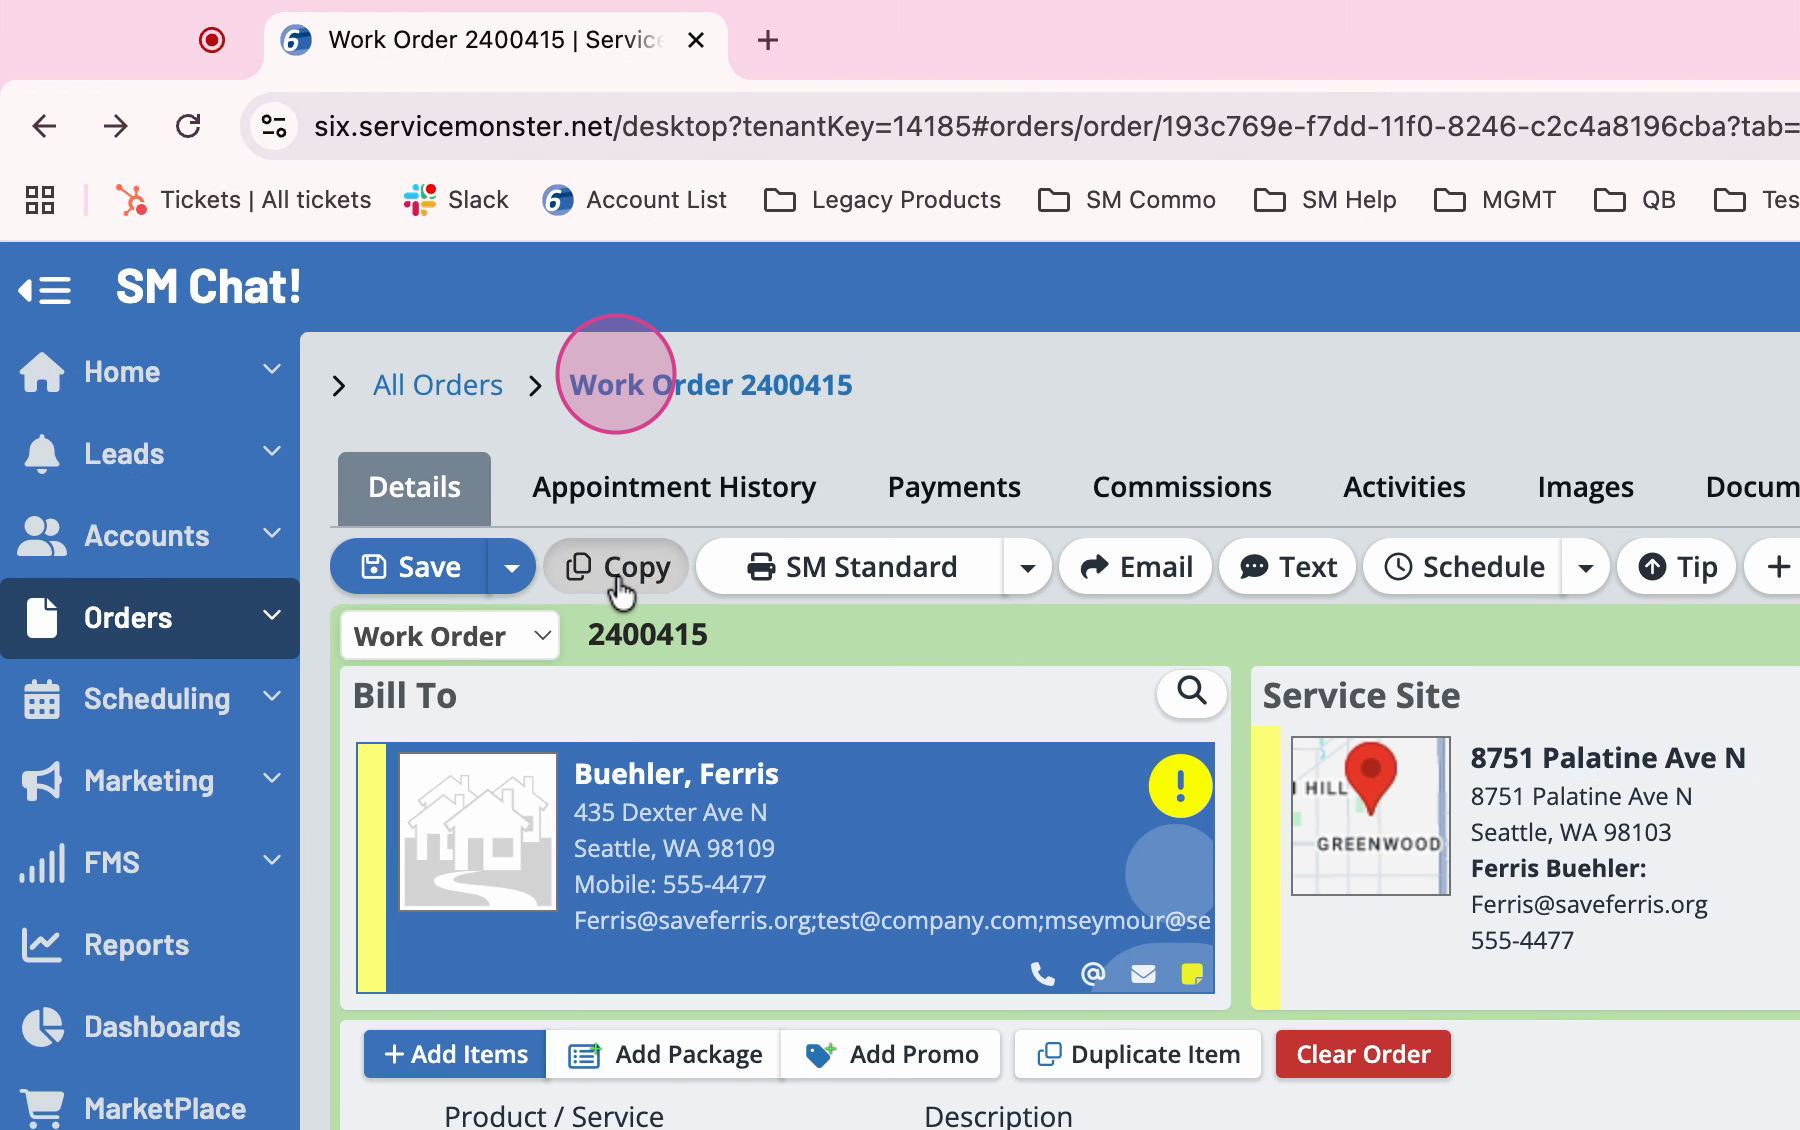
Step 4: The system creates a new order with its own number.

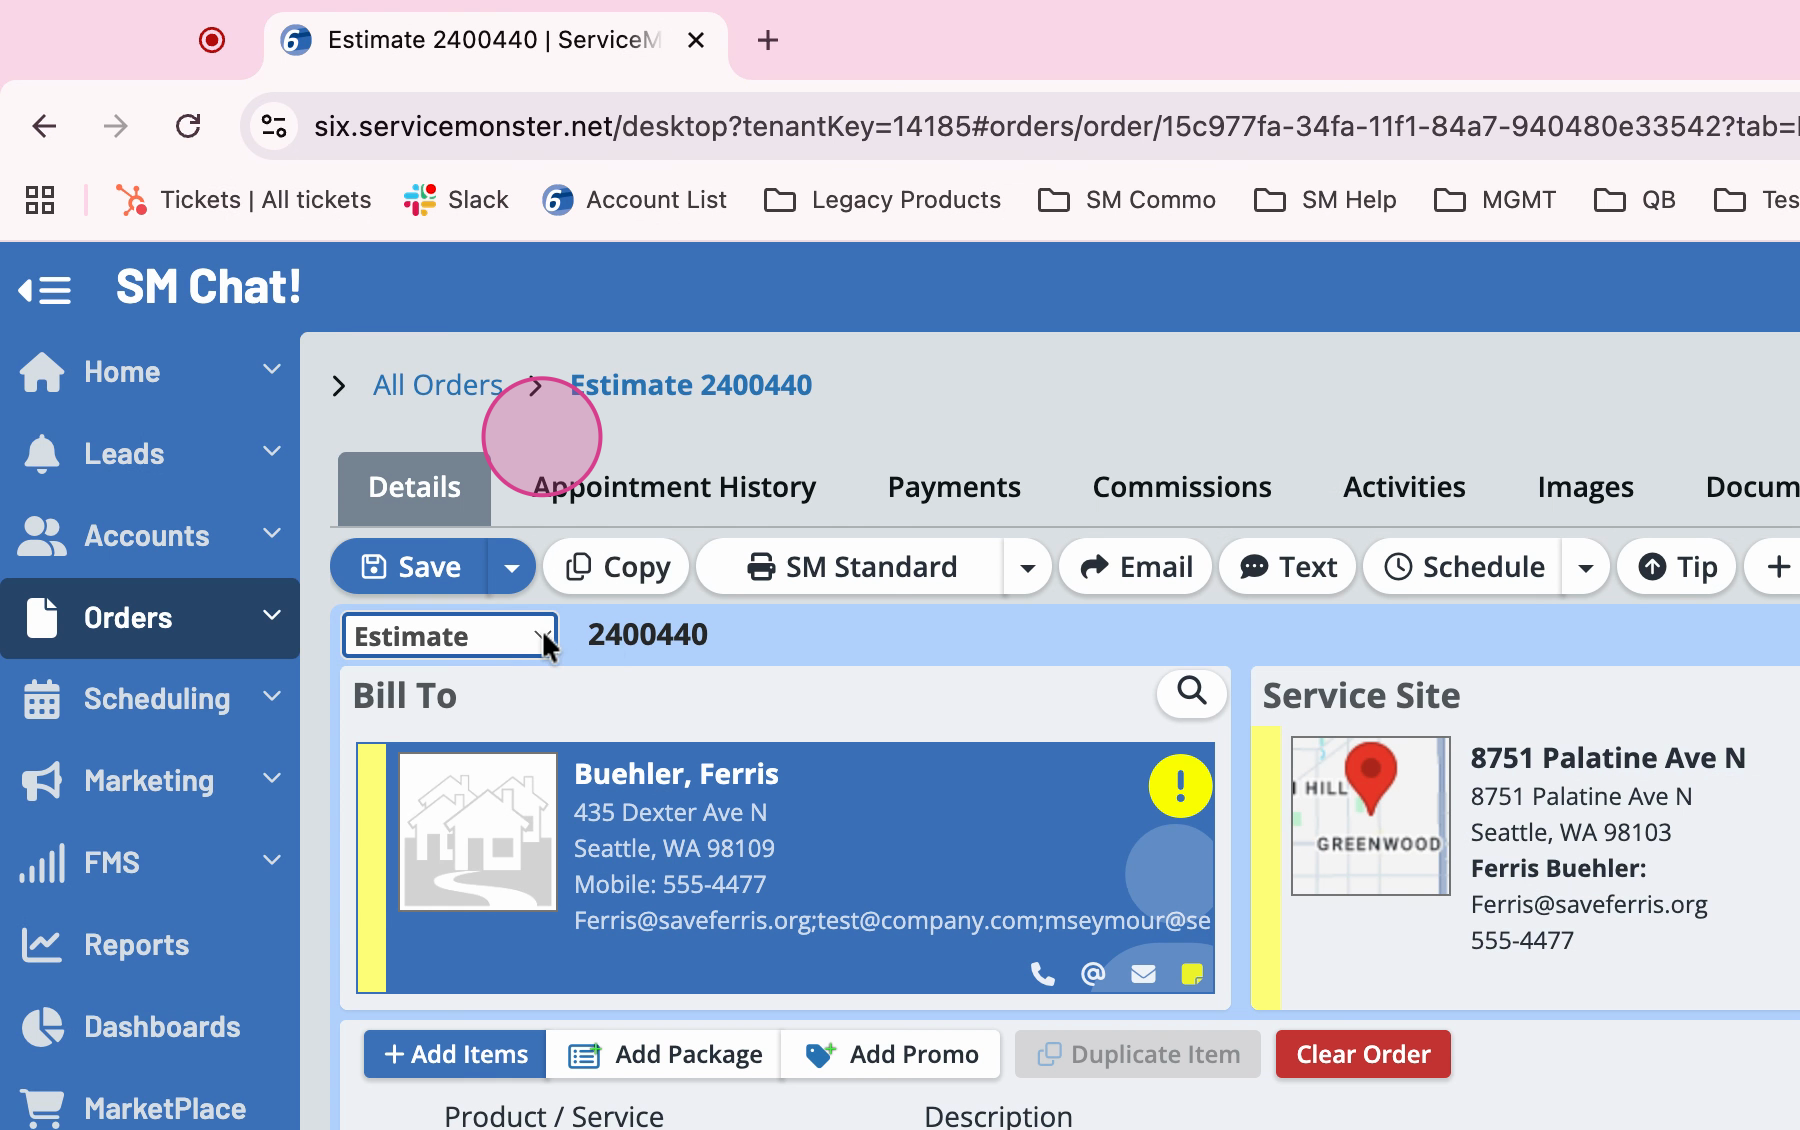
Step 5: Change this new order’s type to Work Order, then click Save.
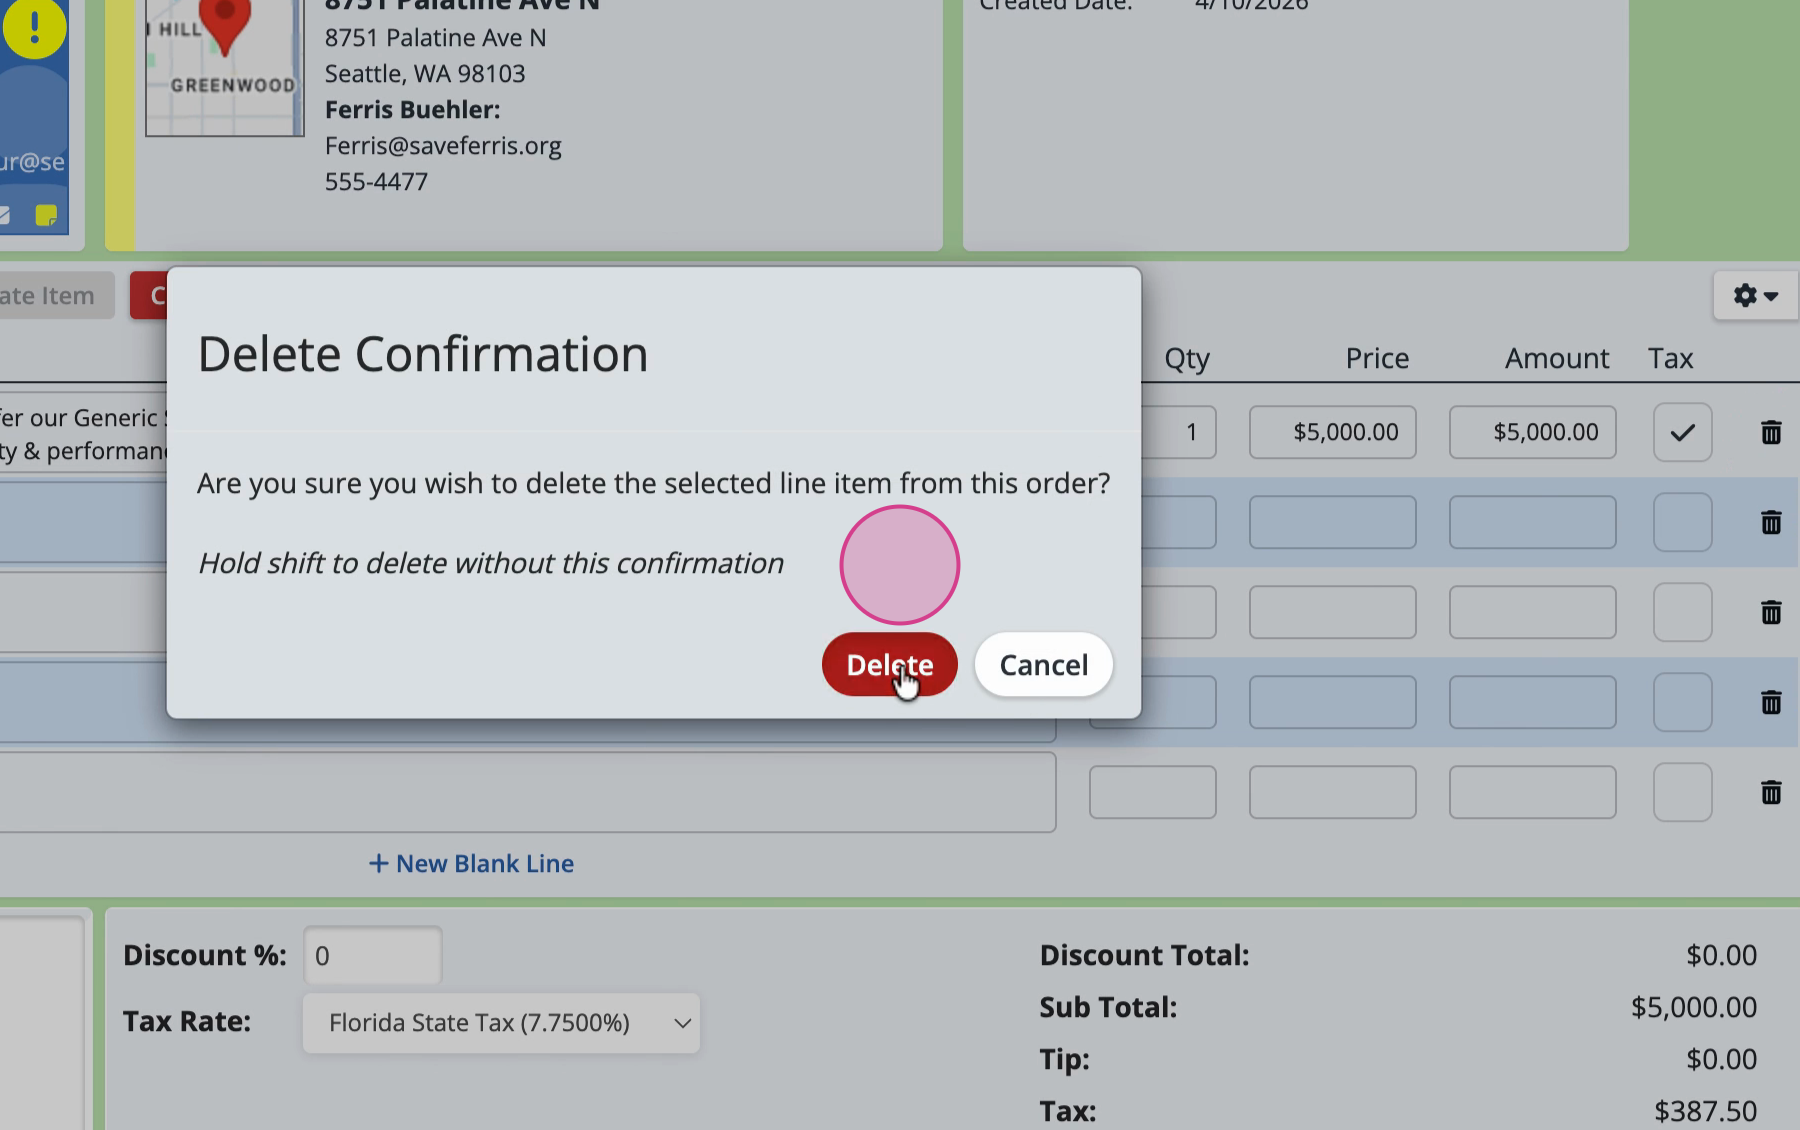
Step 6: Scroll down and delete any existing line items copied over from the original order.
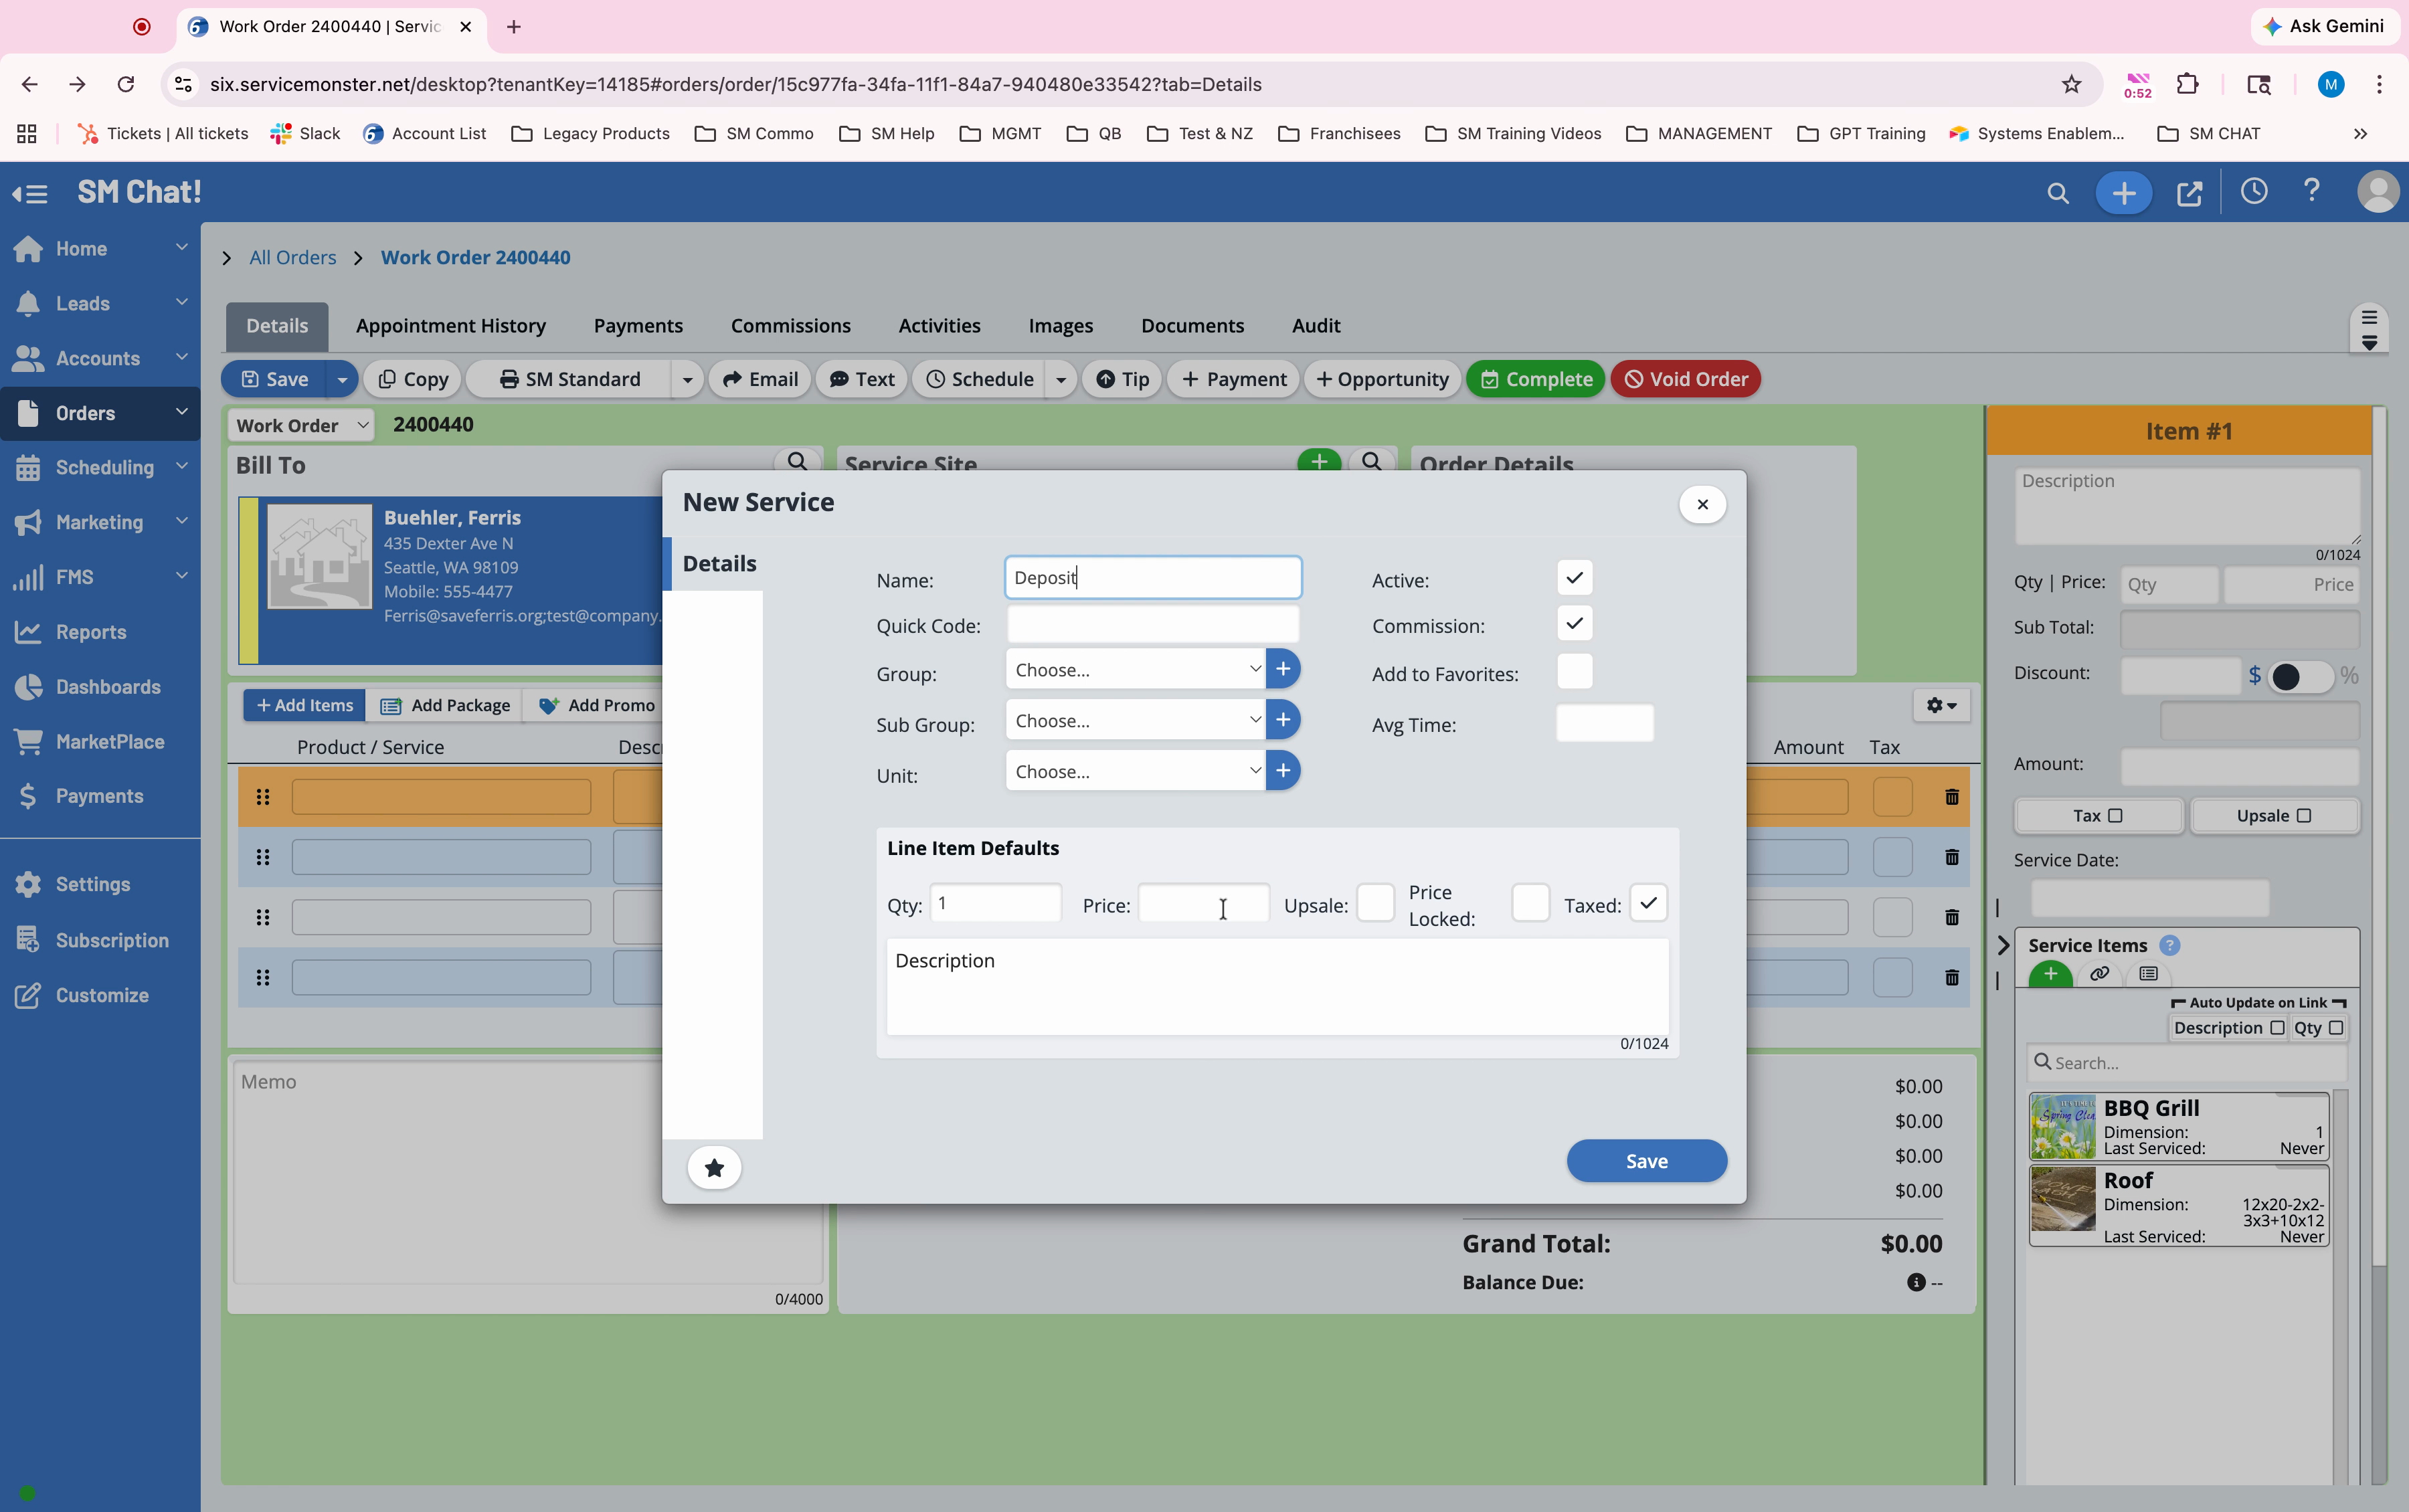
Step 7: Add a new line item called “Deposit.” If you don’t already have this option, click + Service to create it.
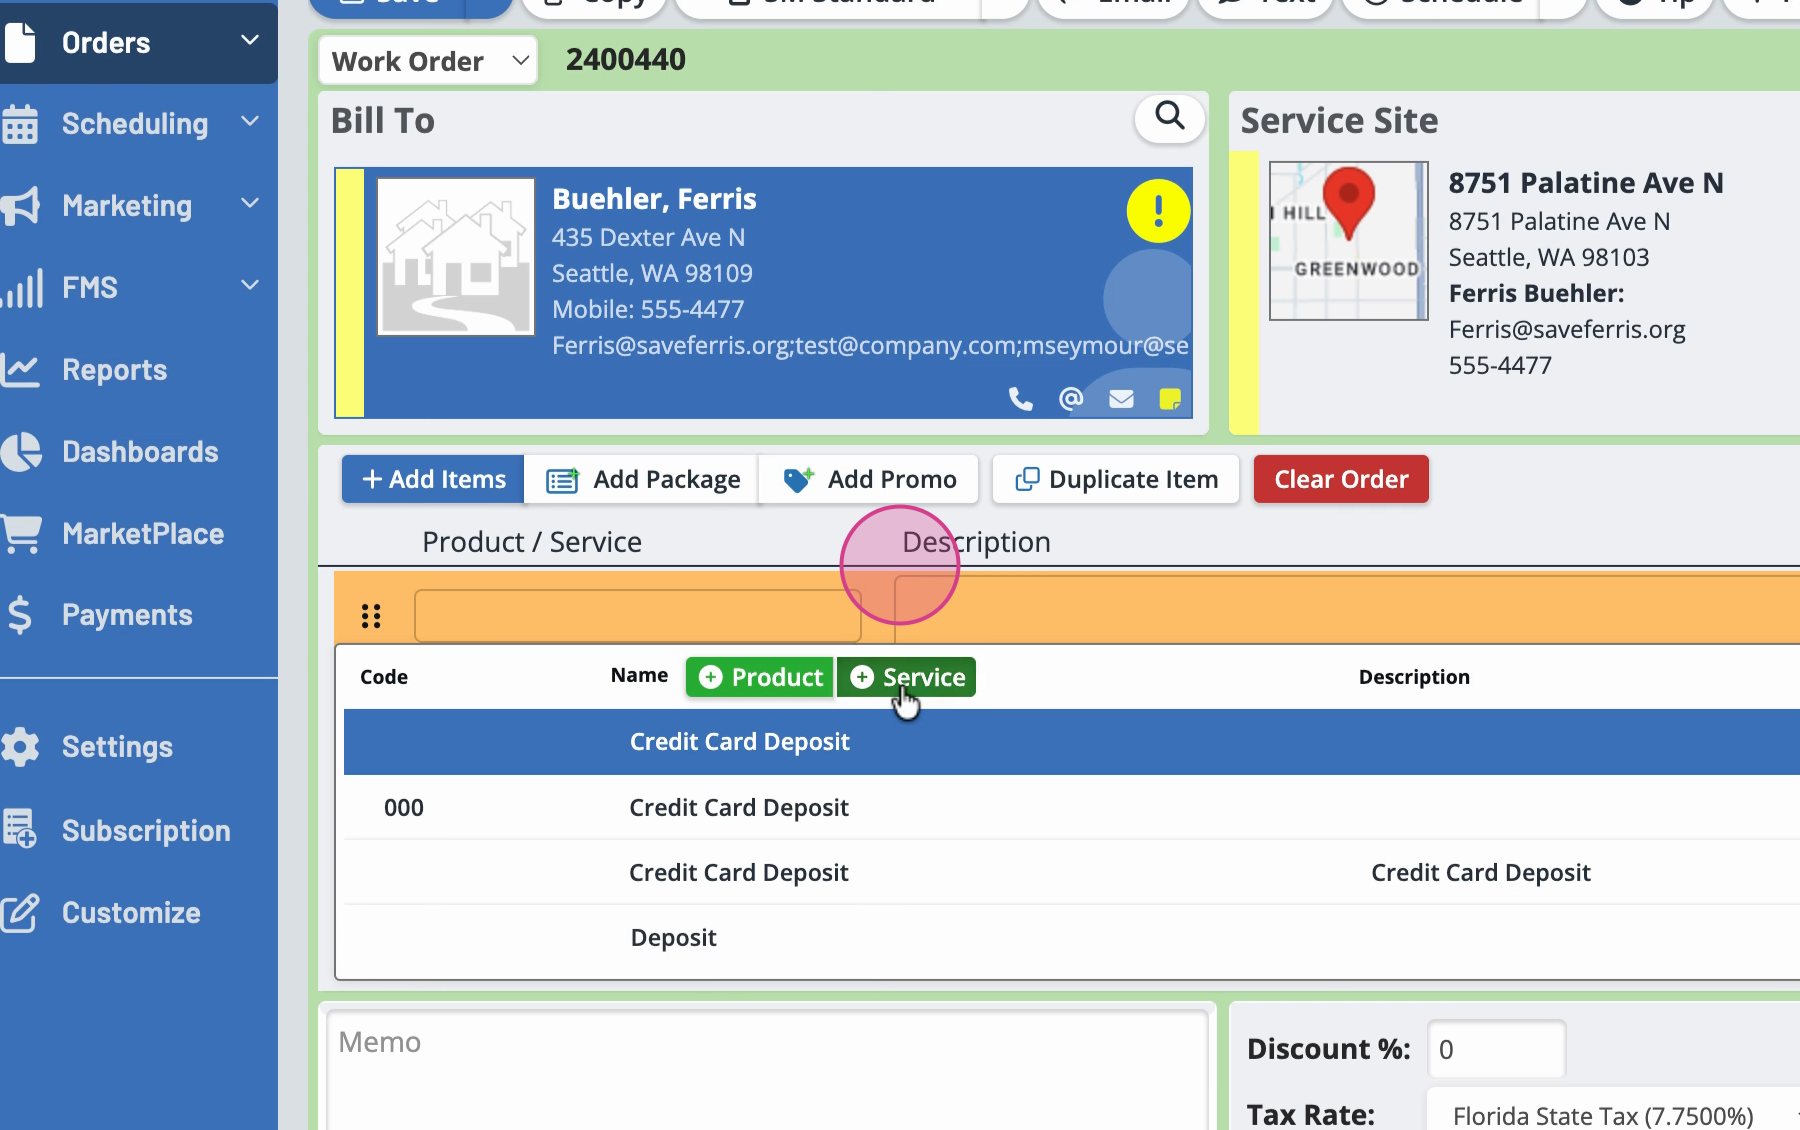
Step 8: Name the service “Deposit.” Leave the description and price blank, and click Save.
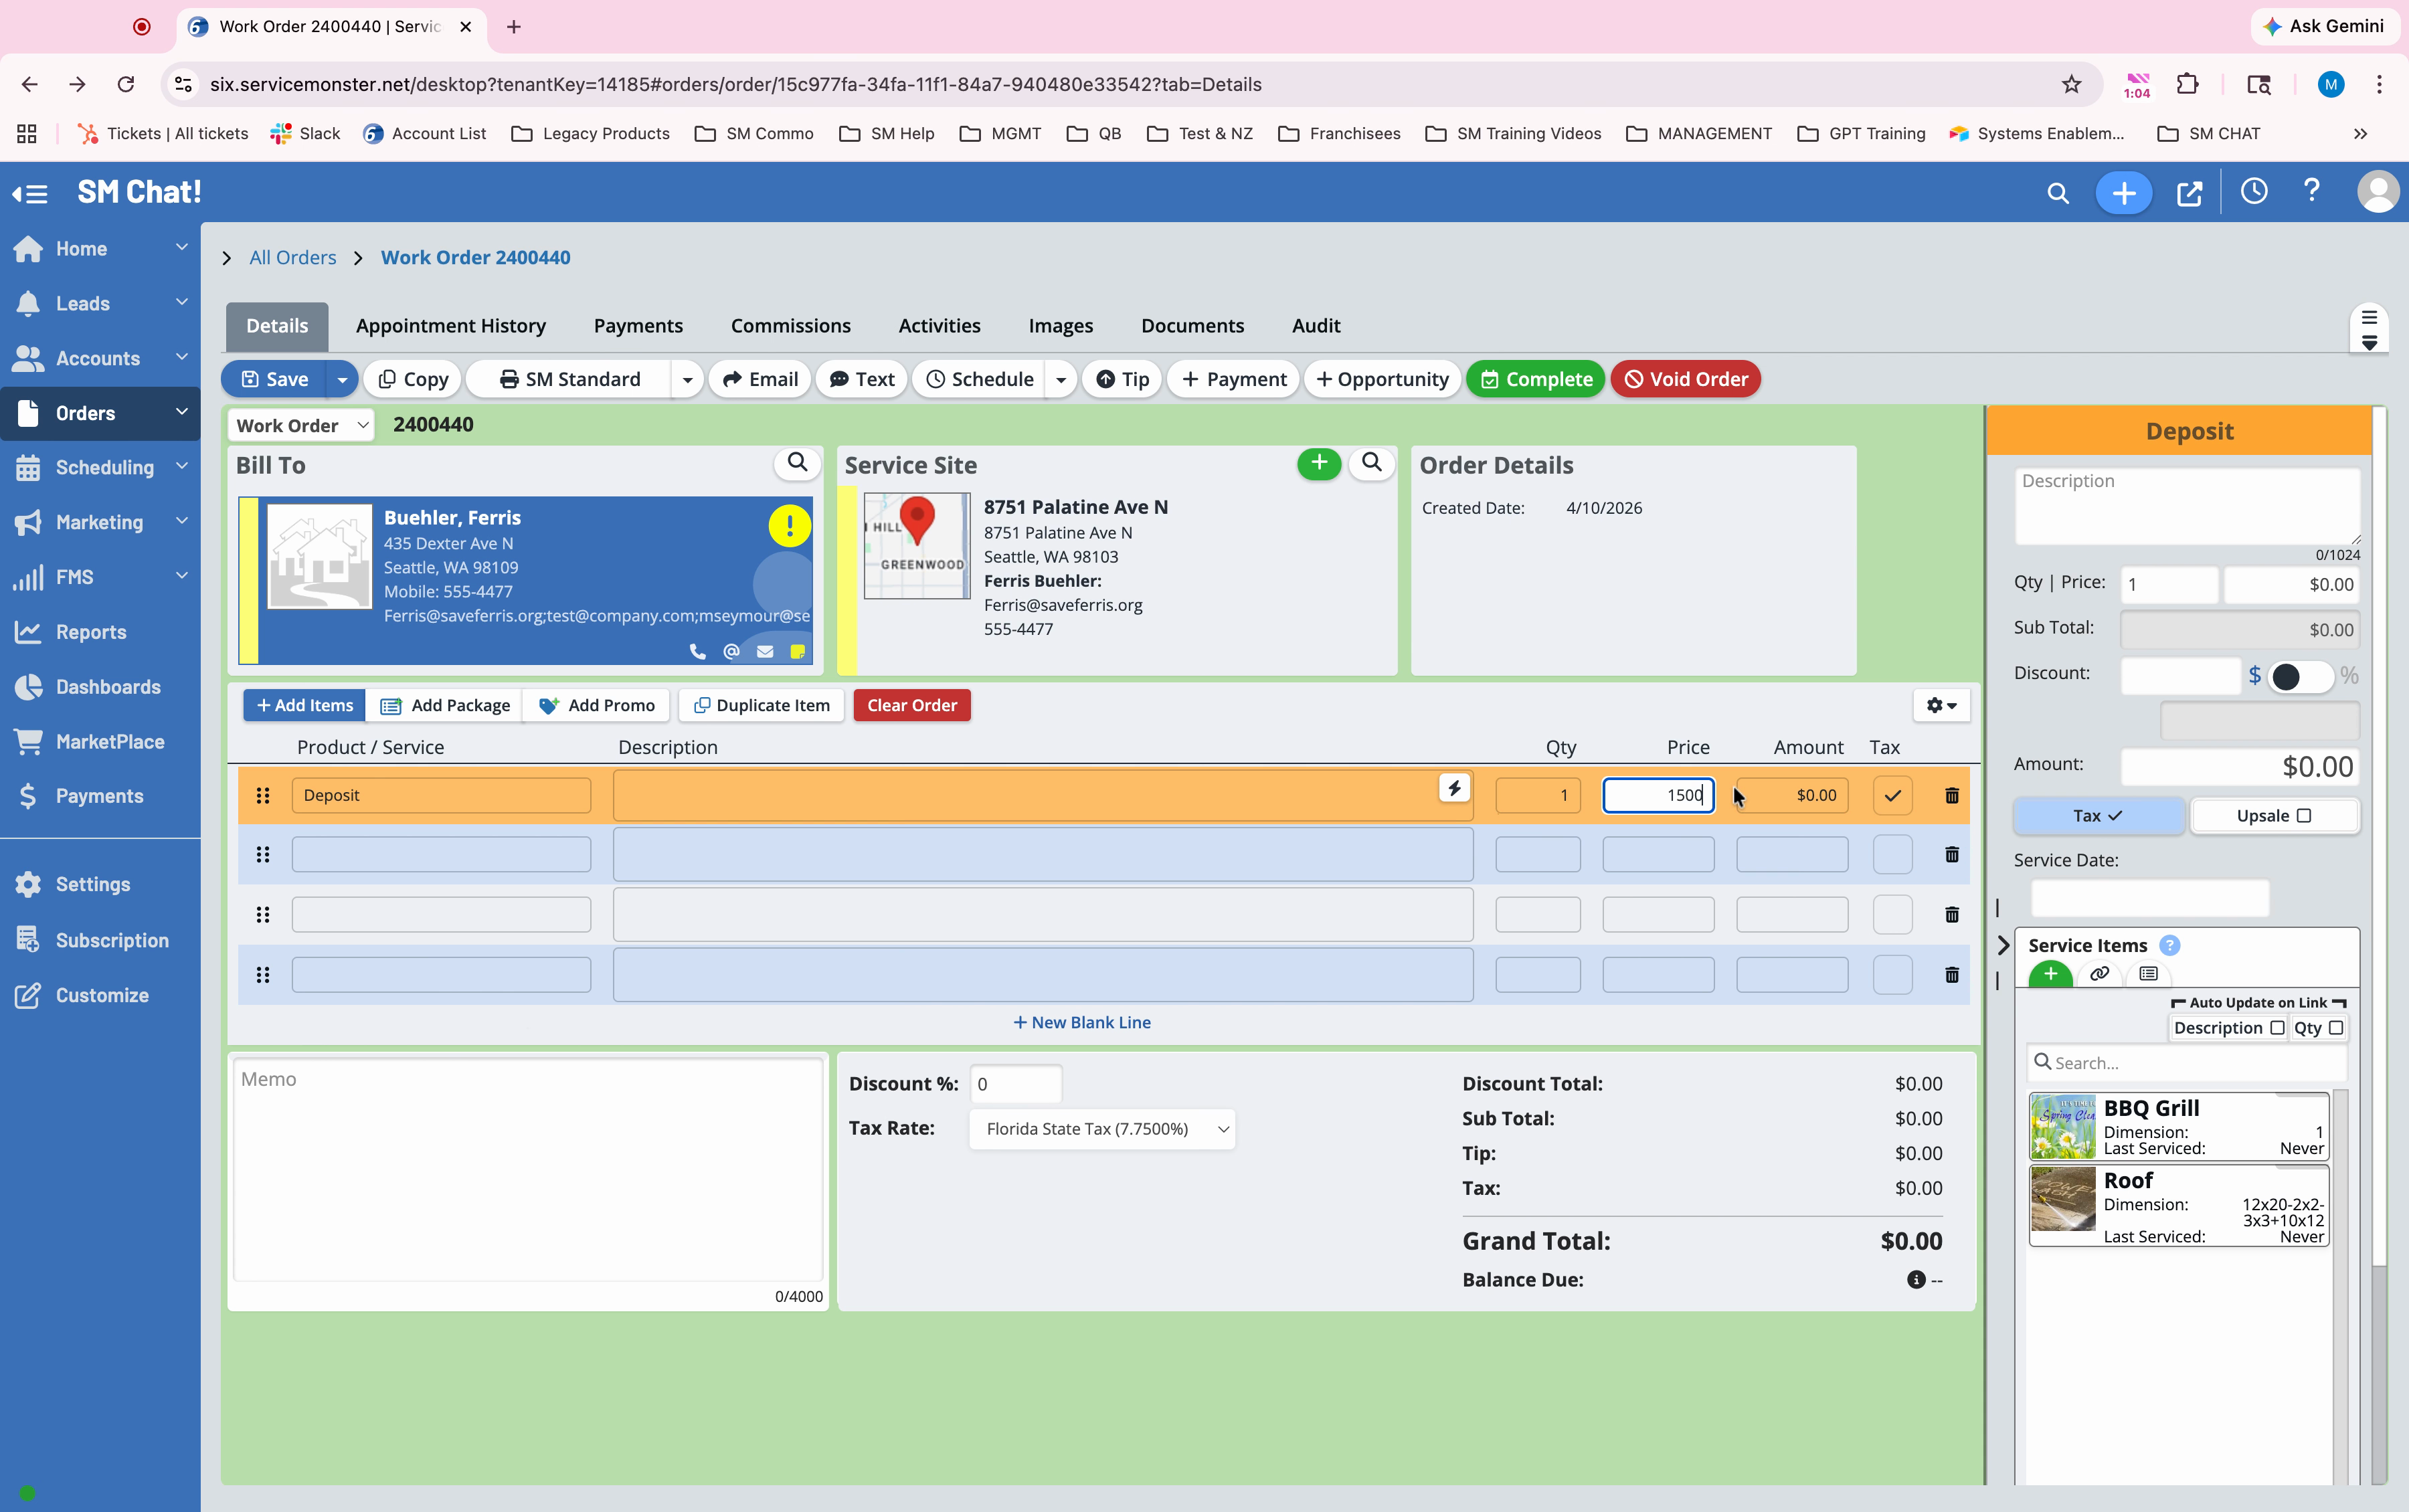
Step 9: Enter the deposit amount as the price for this line item, then click Save.
Step 10: Process the deposit payment (via credit card, ACH, or by sending the customer an email or text link). Once the payment is made, return to the deposit order.
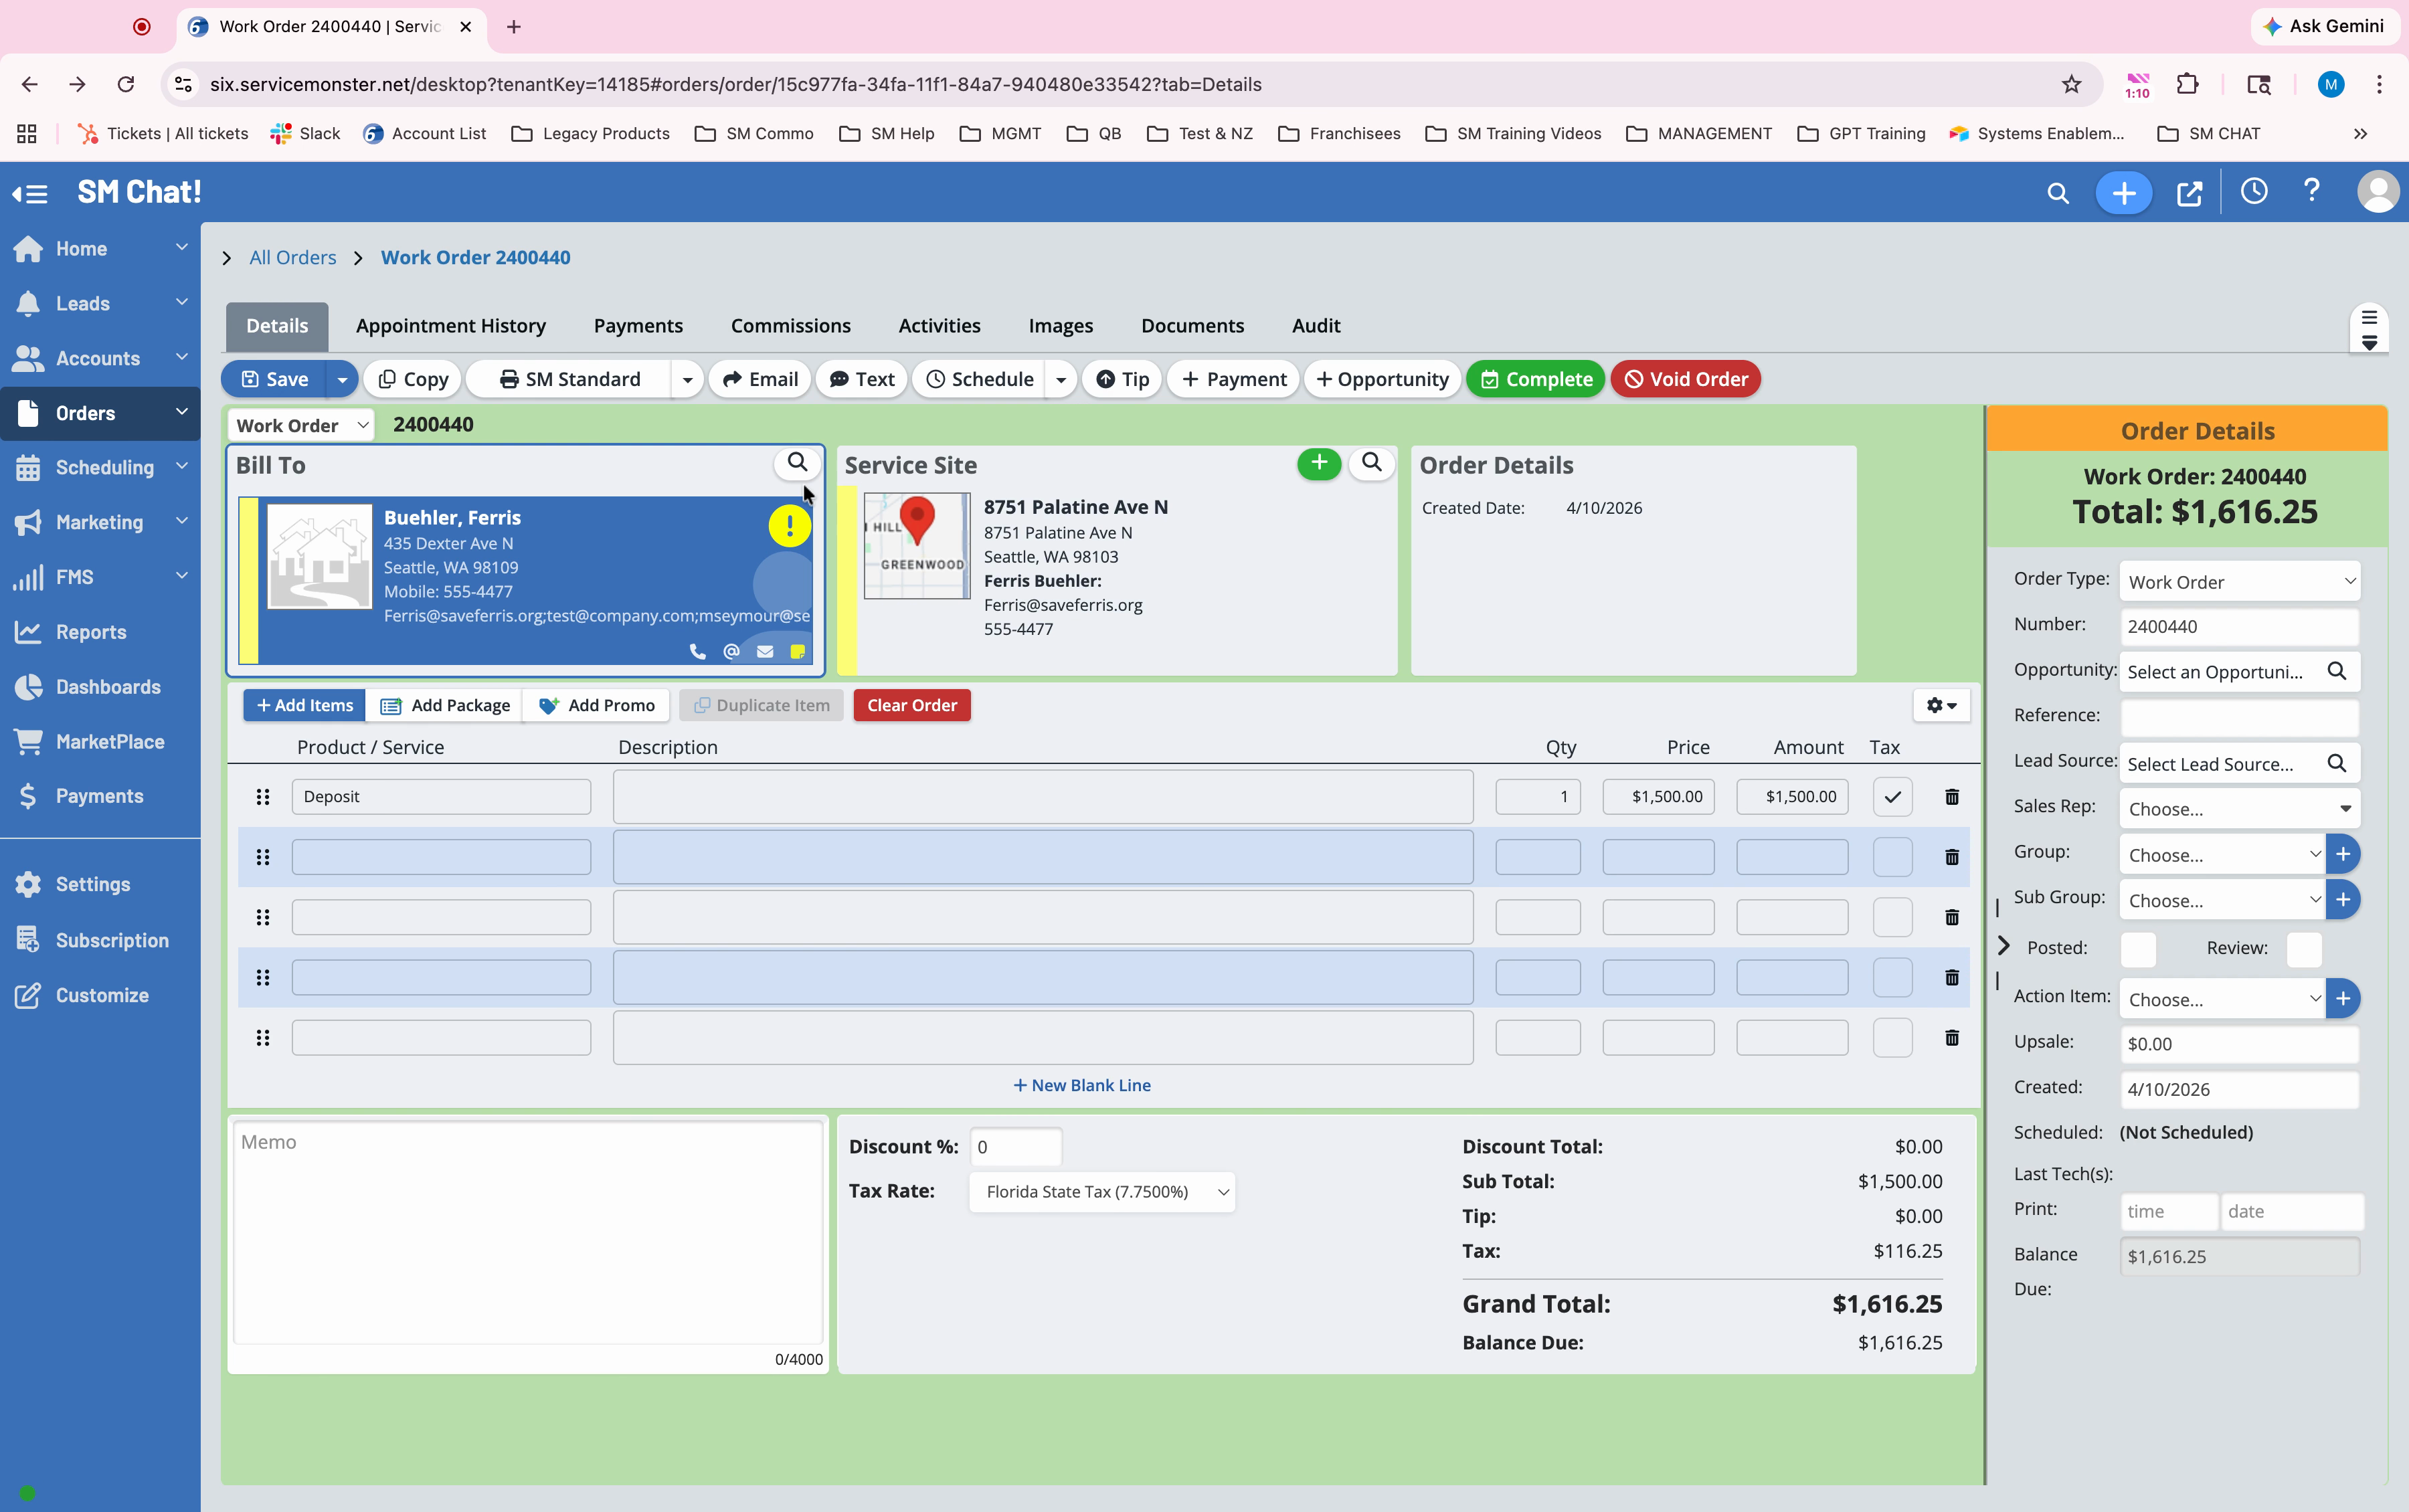
Step 11: Switch the deposit order’s type to Invoice and click Save.
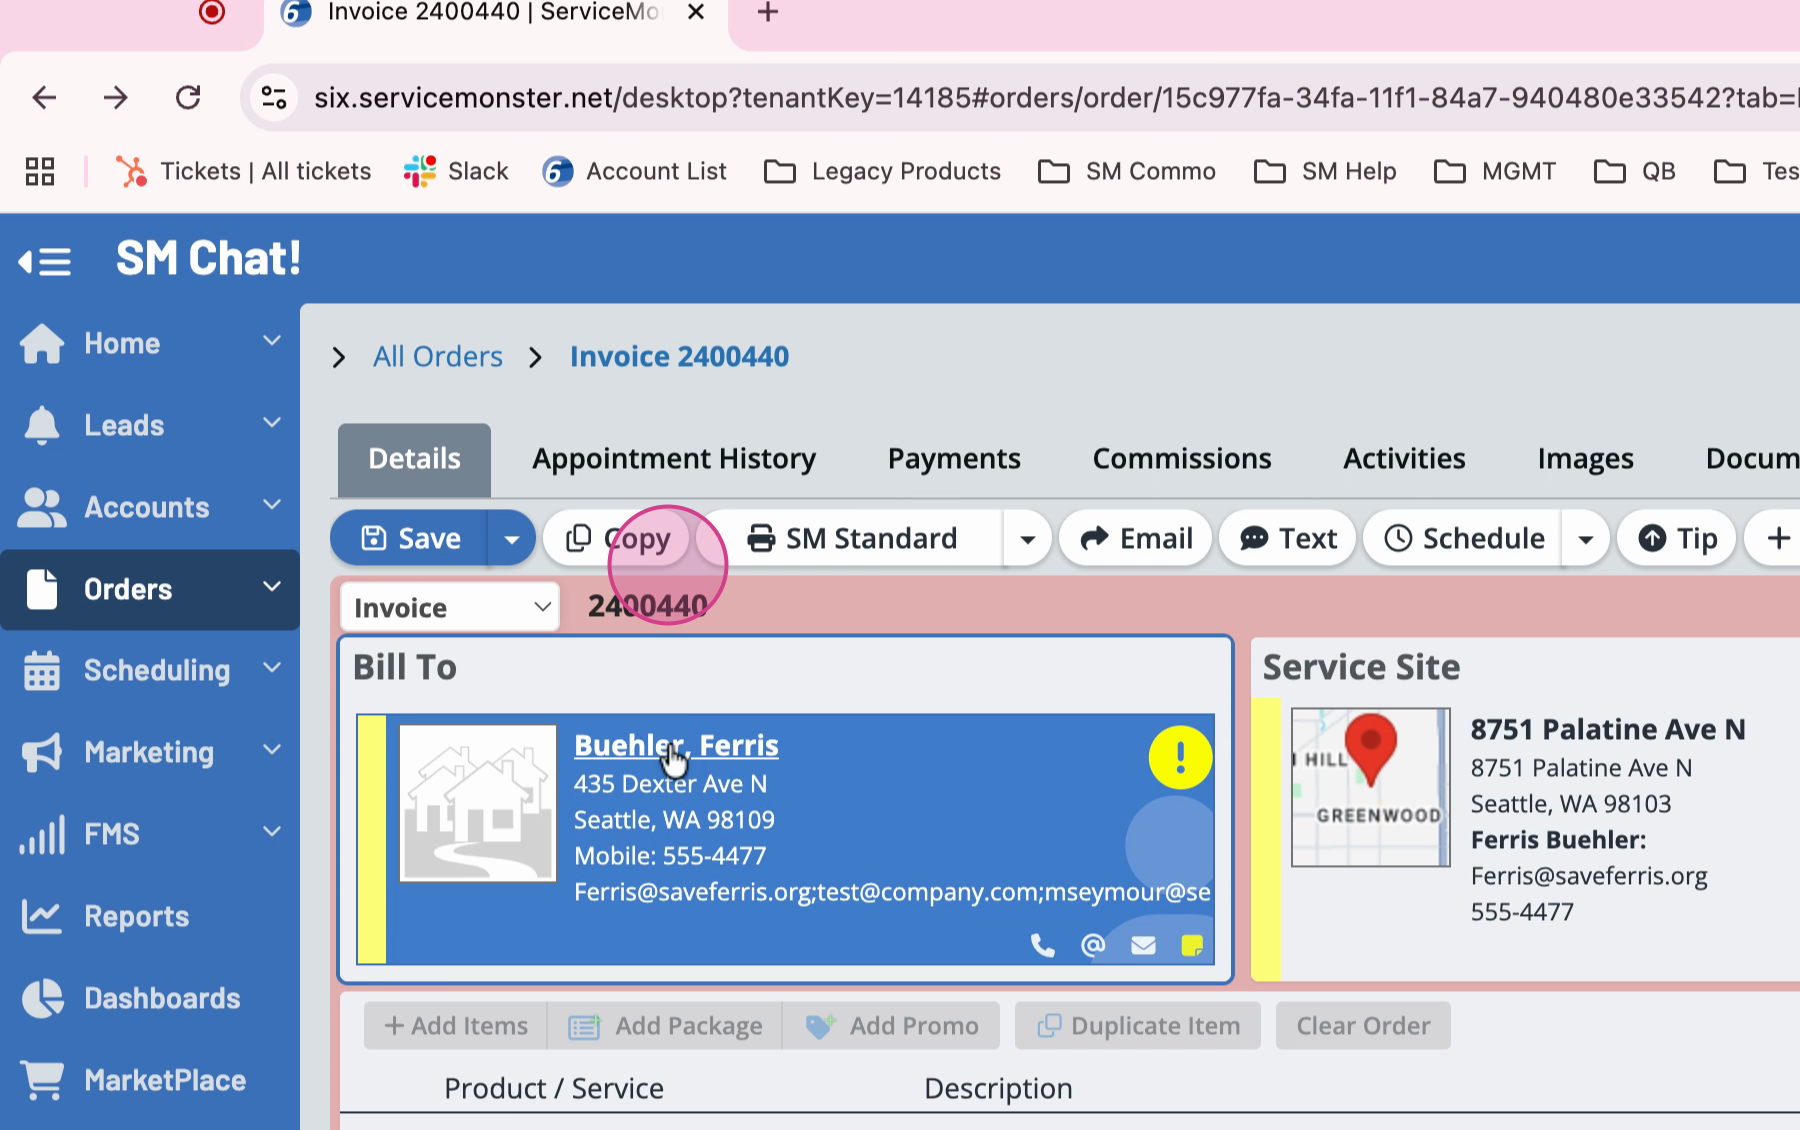
Step 12: Highlight and copy the deposit order number for reference.
Step 13: Click the customer’s name to go to their profile.
Step 14: On the overview screen, find the original work order that’s receiving the deposit.
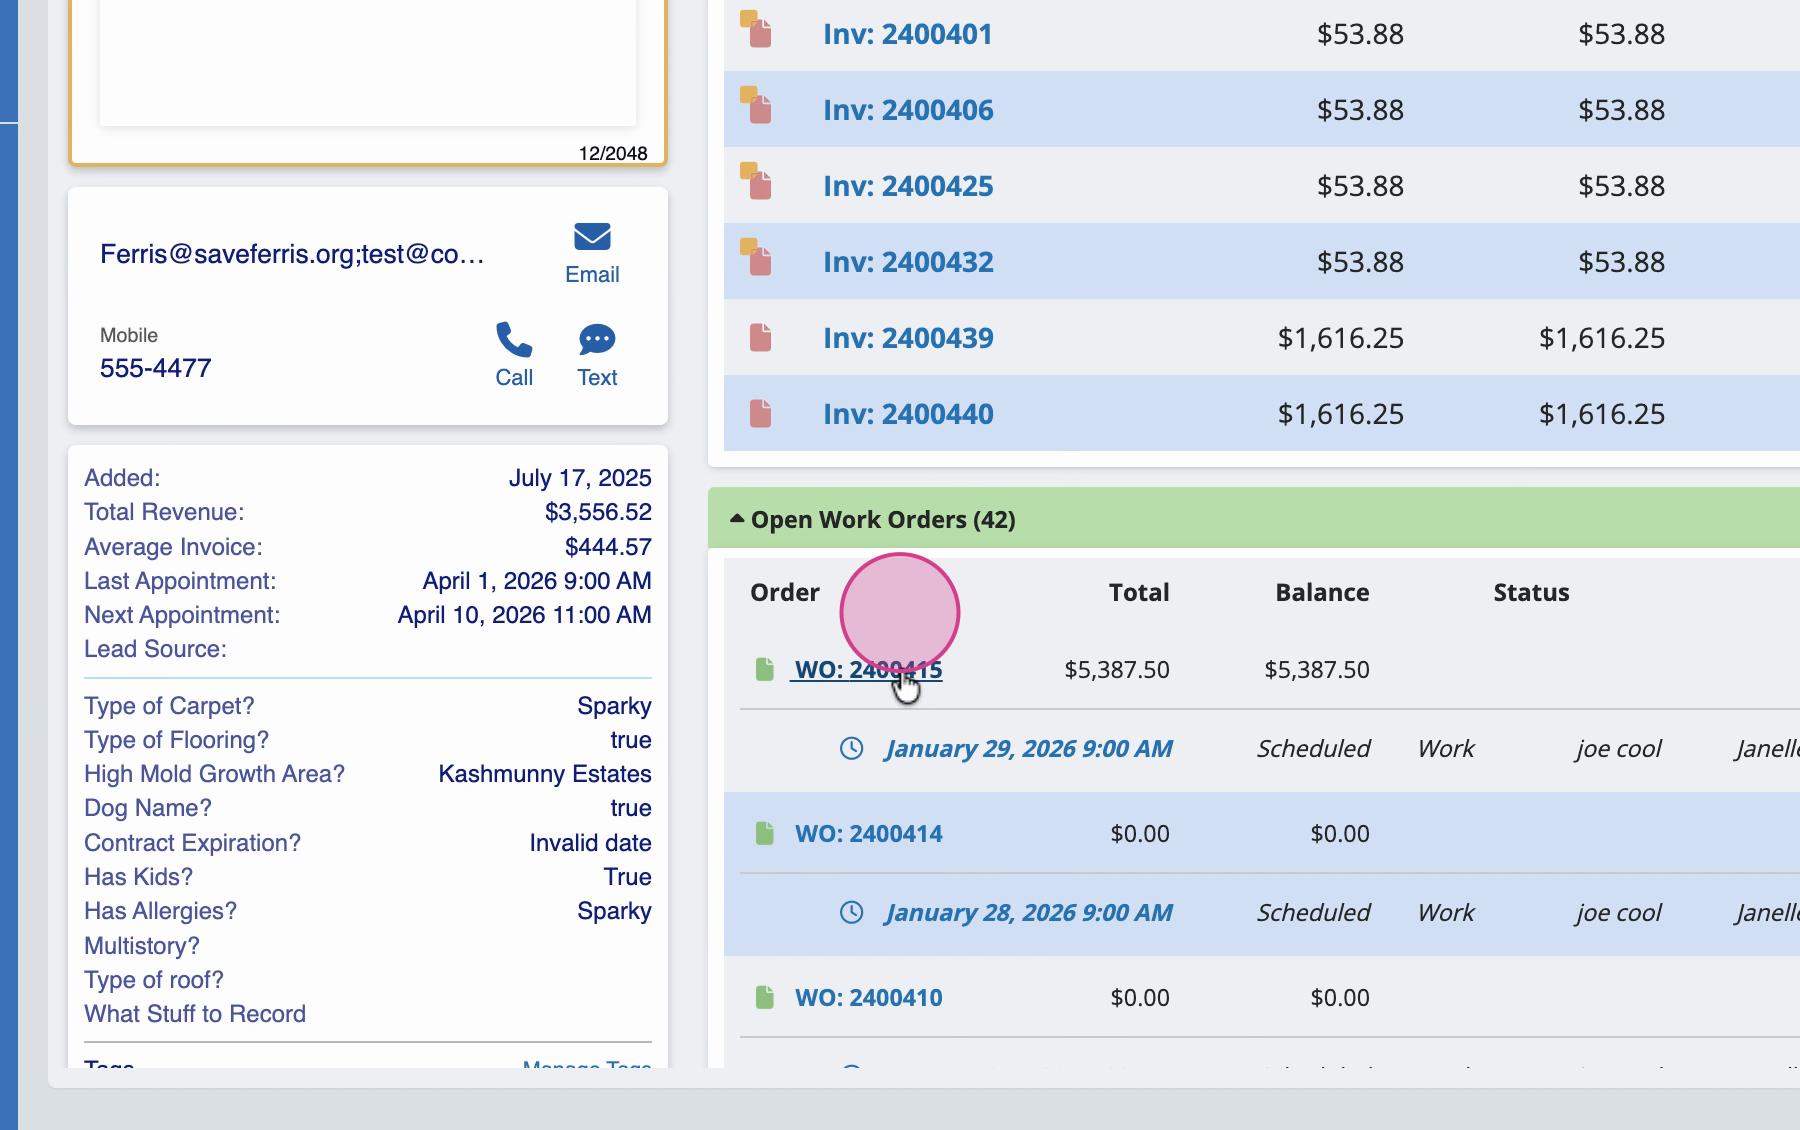
Step 15: Add a new line item to this original order called “Correction.”
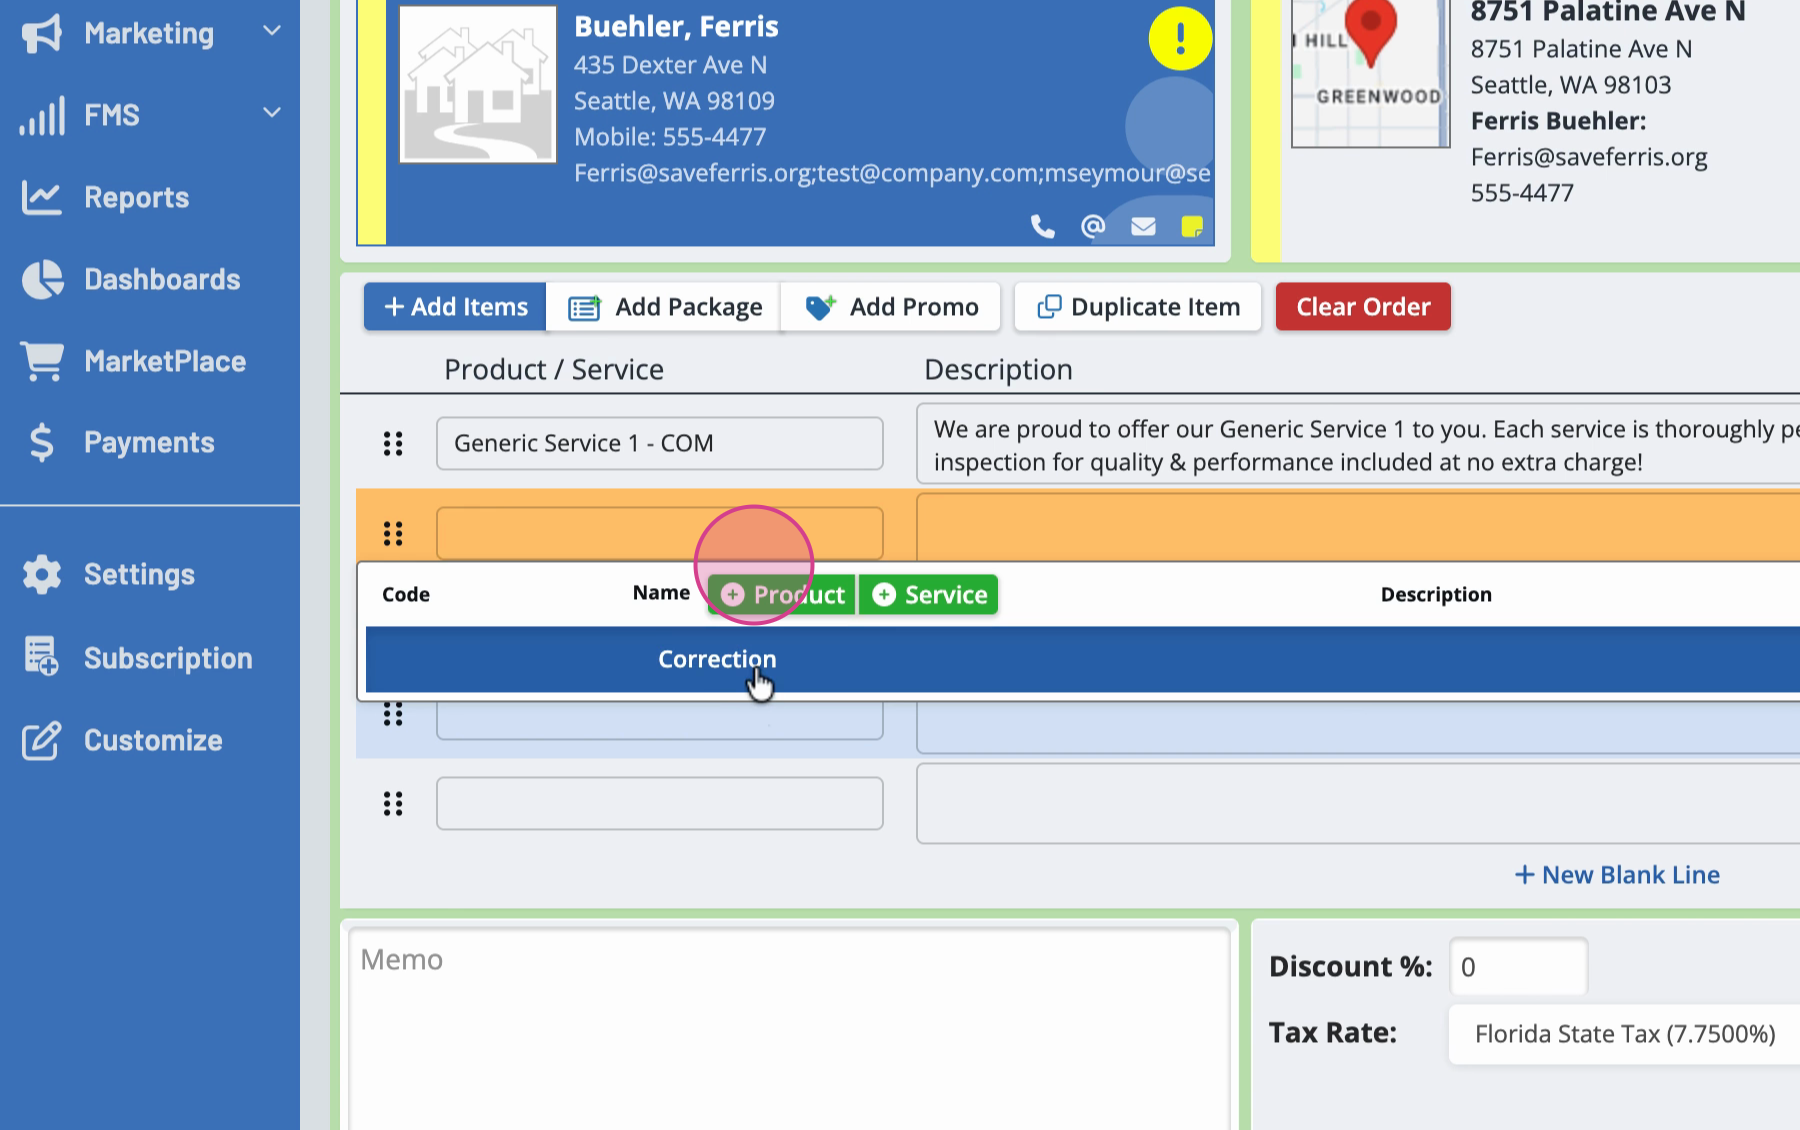
Step 16: Enter “Deposit taken on order [Order Number]” as the description, paste the deposit order number, and use a negative amount (e.g., -$1,500) for the deposit.

Step 17: Click Save. The customer’s balance now accurately reflects the deposit.

That’s it! You’ve successfully recorded a deposit, linked it to the correct order, and kept your financials in order. This process keeps everything transparent and your customer balances accurate.