Editing Your Picklists
Within ServiceMonster, Picklists are what we call the customizable drop-down lists that you can customize to make your own. For example, when creating a product or service you can assign them to a group for easier visibility and sorting on reports.
How can I Edit My Picklists?
This group field can be edited to whatever group names you want to add to the list and can then be selected easily moving forward. If you want to edit, remove, or add new options to a pick list you can do that from the Picklists page.
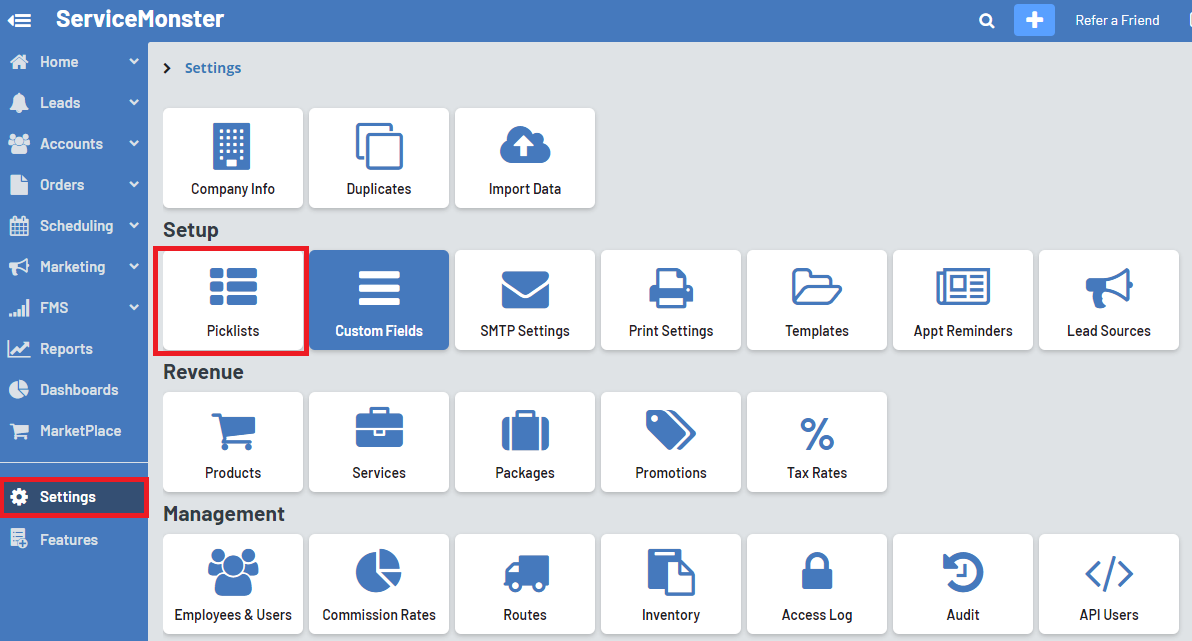
To access this, click on “Settings” in the left-hand side menu and select “Picklists”.

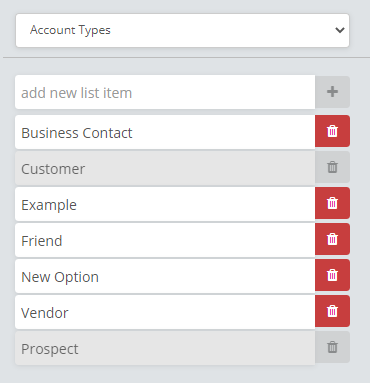
This will take you to a page where you can view and edit your picklists. Use the drop-down menu to switch which list you are looking at.

You can remove options from the list by clicking on the red trashcan icon. Keep in mind that options created by ServiceMonster may not be able to be edited or removed, such as the account types “Customer” and “Prospect”.
You can create a new option by typing it in the box that says “add new list item” then clicking on the green “+” next to it.
You can also change what an item is named by clicking on its name and typing in any changes. Just keep in mind those changes will adjust anything that is currently assigned that option.
So If I were to change the “Friend” account type to be “Best Friend” all accounts that had been labeled as “Friend” will now appear as “Best Friend”.
