Self Importing Accounts
Importing past client's information into ServiceMonster helps simplify your future orders by already having client's information available. That way you can also reach out to clients with Marketing Campaigns.
How to Self Import Accounts:
Your first step will be creating a CSV file with your client's information. This can be done in Microsoft Excel.
Click here to download a excel sheet that already has all the possible import fields included.
Once you have the template, simply fill out each row with the client information. Each column will designate a specific field, so just ensure the data you are filling in matches the column. Keep in mind, some fields require specific formatting, so check the "import fields" section at the bottom of the page for reference
Also note: you do not need to use every field, so if you don't have it all don't fret. At minimum we recommend including First and Last Name, Company Name (if applicable), Phone Number, Email Address, and Primary Site Address information.
Obviously, the more information you are able to bring over the smoother the transition, but with the minimum recommendation you have enough to know the client's name, location, and contact information.
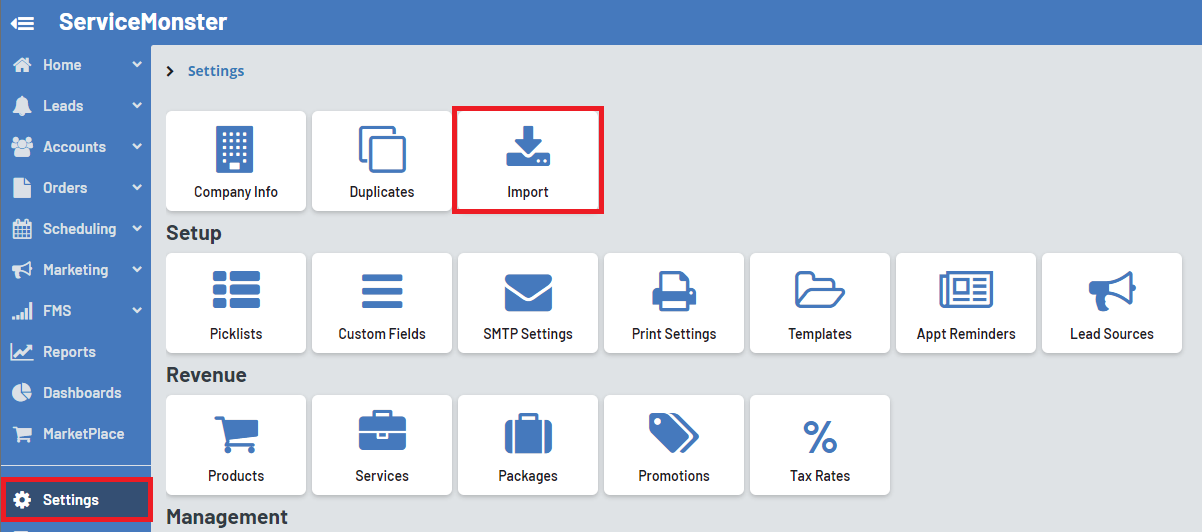
From the Settings page, click on "Import"

First, make sure that in the "Select Upload Type" that "Accounts" is selected.

On the self Import page, click on "Choose Files" and find the CSV file you created.

You will then see a list of your accounts and can confirm the information is categorized correctly.

If everything is correct, simply click on the green "Import" button to create those accounts in your system.
Import Fields
Active: True or False, True if they are an active account, False if not.
Salutation: Title for the client on the account, Mr., Miss, Ms.
First Name: The first name of the client associated with the account.
Last Name: The last name of the client associated with the account.
Company Name: The name of the company associated with this account.
Commercial: True or False. True if the account is a commercial account, false if they are a residential account.
Account Type: Prospect or Customer
Account Sub Type: Add in the subtype for the account. Essentially a tagging system to categorize your accounts differently for marketing or follow up purposes. Common examples include Property Management, Realtors, Retail, Restaurant, VIP, Etc.
Acquisition Date: The date you started working with this client, formatted as MM/DD/YYYY
Phone1: The client’s first phone number.
Phone2: The client’s second phone number.
Phone3: The client’s third phone number.
Fax: Client’s faxing number.
Email: Client’s email address.
Payment Terms: The payment terms for orders on this client's account, choose from "Due Upon Receipt", "Net 15", "Net 30", or "Net 60".
Memo: The account memo which you can see at the top of the accounts page, you can add up to 2048 characters.
Reference: Can be used for short, common note or field when a custom field is less desired. This field is searchable. The account reference field limited to 128 characters.
Lead source: The lead source for the account, so how they found out about your business.
Address1: Line 1 of the primary site address for this account. (Street address)
Address2: Line 2 of the primary site address for this account. (Apt/Suite #, etc)
City: City of the primary site address for this account.
County: County of the primary site address for this account.
Country: Country of the primary site address for this account.
State: State of the primary site address for this account.
Zip: Zip code of the primary site address for this account.
Alert: True or False, True if there should be an alert on this account, false if not.
Phone 1 label: Choose between Mobile, Home, Or Work so you know what type of phone the Phone1 number will be reaching.
Phone 2 Label: Choose between Mobile, Home, Or Work so you know what type of phone the Phone2 number will be reaching.
Phone 3 Label: Choose between Mobile, Home, Or Work so you know what type of phone the Phone3 number will be reaching.
Do No Mail: True or False, set these as true if the client has requested to not receive marketing notices from you via that contact method.
Do Not Call: True or False, set these as true if the client has requested to not receive marketing notices from you via that contact method.
Do Not Email: True or False, set these as true if the client has requested to not receive marketing notices from you via that contact method.
Last Invoice Amt: The total for the last invoice you have for this account. Having this information is helpful to begin client retention marketing right away based on the amount charged for previous work done.
Last Invoice Date: The last day you did work with this client. Formatted as MM/DD/YYYY. Having this information is helpful to begin client retention marketing right away based on the last date of previous work done.
Site Reference: Additional site field that you can use for just about anything.
Site Note: Place to store site specific notes such as gate codes, driving instructions, equipment needs, ect.
2nd Site Name: Optional field if you wish to name the site. Will default to the street address if blank
2nd Site Address1: The first address link for the second site. (Street address)
2nd Site Address2: The second address line for the second site. (Apt/Suite #, etc)
2nd Site City: The city for the second site on this account.
2nd Site Zip: The zipcode for the second site on this account.
2nd Site County: The county for the second site on this account.
2nd Site Country: The country for the second site on this account.
2nd Site Contact: The name of the contact person for the second site on this account.
2nd Site Phone1: The phone number for the second site on this account.
